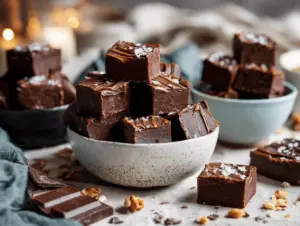
Chocolate fudge that melts in your mouth—there’s nothing quite like it! The aroma of rich cocoa wafting from the kitchen instantly brings back memories of family gatherings and holiday celebrations. I’ll be honest, when I first stumbled upon this 3 ingredient chocolate fudge recipe, I thought it was too good to be true. Only three ingredients, no candy thermometer, and no fuss? Sign me up.
I’ve always been a fan of simple, satisfying desserts, especially when life gets busy or my sweet tooth won’t take “later” for an answer. This chocolate fudge recipe became my go-to during college finals week. I’d whip it up in the tiny dorm kitchenette, share squares with friends, and watch their eyes widen after a single bite. The secret is in the simplicity—each ingredient plays its part perfectly.
This recipe isn’t just about convenience. It’s about pure, chocolatey indulgence you can enjoy at any time. Whether you’re looking for a quick treat to satisfy cravings, something to impress at a potluck, or a homemade gift that looks like you spent hours crafting, this chocolate fudge delivers every time. If you’ve ever doubted your baking skills, let me tell you—this is the recipe that will make you feel like a kitchen superstar!
After testing countless fudge recipes and tweaking ratios, I can confidently say this is the best 3 ingredient chocolate fudge recipe for effortless indulgence. Perfect for busy families, chocolate lovers, and anyone who craves a little sweetness in their day without a huge mess. Get ready, because your chocolate fudge game is about to level up—without any complicated steps.
Why You’ll Love This Recipe
- Quick & Easy: Seriously, you only need about 10 minutes of hands-on time. The hardest part is waiting for it to set!
- Simple Ingredients: You probably have everything already—no last-minute grocery runs or specialty items required.
- Perfect for Any Occasion: Whether it’s a casual movie night, a holiday tray, or a homemade gift, this fudge fits in everywhere.
- Crowd-Pleaser: Kids, adults, picky eaters—everyone goes wild for these creamy, chocolate squares.
- Unbelievably Delicious: Smooth, rich, and chocolate-forward, with just the right amount of sweetness.
What really makes this chocolate fudge recipe stand out is the technique. Instead of melting chocolate alone, you mix it with sweetened condensed milk and a touch of butter (or coconut oil for a twist), which creates an ultra-creamy texture. Honestly, my family asks for this fudge every holiday, and it never lasts long enough to go stale.
This isn’t just another fudge recipe. No grainy texture, no complicated steps—just melt, mix, and chill. The magic happens when everything comes together in perfect harmony, and you get that classic fudge flavor with a fraction of the effort. Trust me, if you’ve ever struggled with homemade fudge before, this recipe will change your mind. It’s chocolate fudge reimagined for real life—easy, fast, and full of nostalgia.
I’ve made this recipe at least a dozen times, and each batch is as good as the last. It’s perfect for gifting, sharing, or just indulging on your own. There’s something comforting about knowing you can whip up homemade fudge without a lot of planning. If you want a recipe that’s sure to impress and never fails, this is the one to bookmark.
Ingredients Needed
This chocolate fudge recipe is all about minimalism—just three simple ingredients, each chosen for maximum flavor and texture. You don’t need anything fancy, and you can easily swap ingredients to suit your preferences or dietary needs. Here’s what you’ll need:
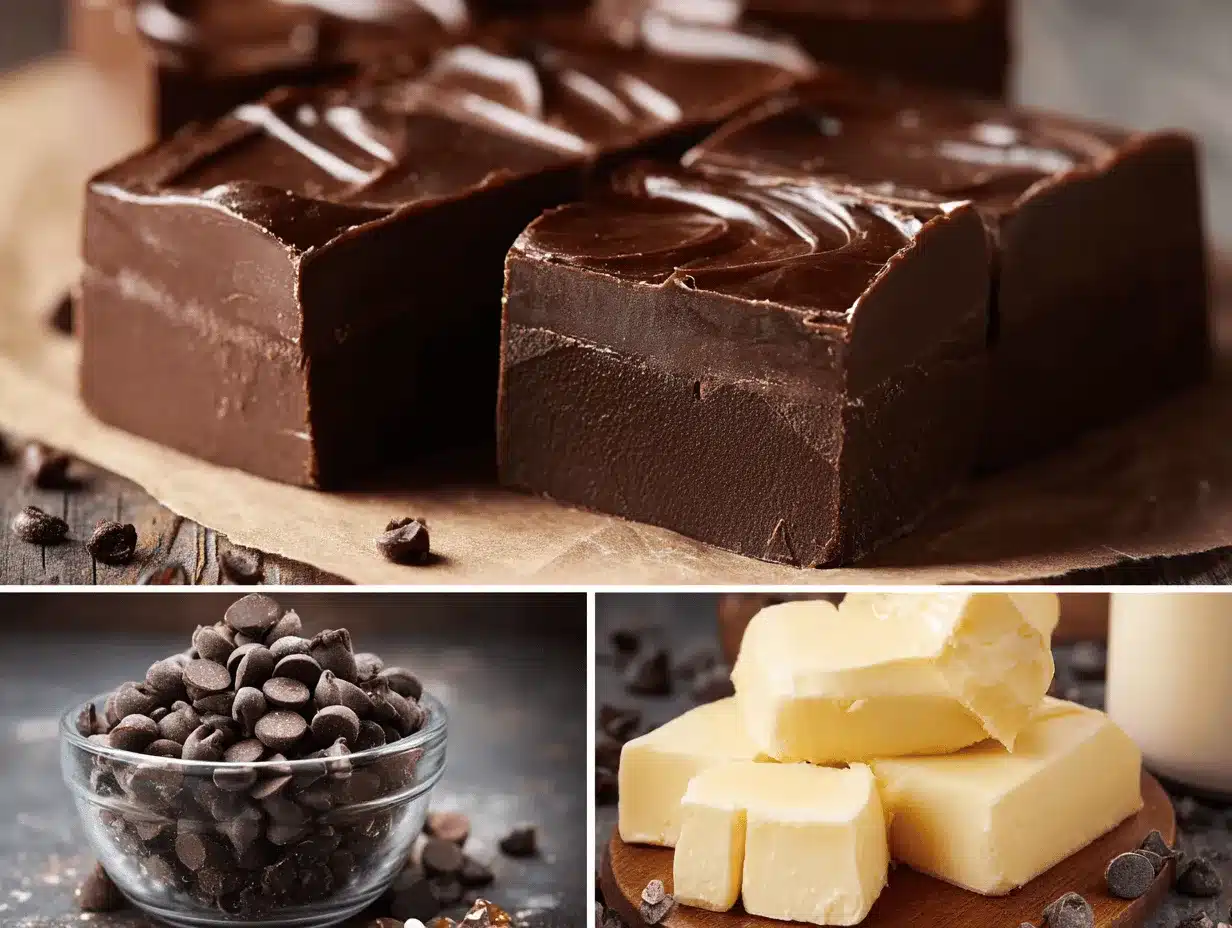
- Chocolate Chips (2 cups / 340g): Semi-sweet or dark chocolate chips work best. You can use milk chocolate for a sweeter fudge or go with a blend for a more complex flavor. I’m partial to Ghirardelli or Trader Joe’s chocolate chips for their smooth melt and deep taste.
- Sweetened Condensed Milk (1 can / 14 oz / 396g): This is the magic ingredient that binds the fudge and adds that signature creamy sweetness. Make sure you grab sweetened, not evaporated milk! Eagle Brand is my standby, but store brands work fine too.
- Butter (2 tablespoons / 28g): Unsalted butter gives the fudge a silky texture and a little richness. If you’re dairy-free, coconut oil or vegan butter also works. (I’ve tried both, and they’re delicious.)
Optional Add-Ins:
- Vanilla Extract (1 teaspoon): Adds a subtle background note. Totally optional, but sometimes I toss it in for a classic touch.
- Pinch of Salt: If you like a little contrast to your sweetness, a pinch of flaky sea salt goes a long way.
- Nuts, dried fruit, or mini marshmallows: For a fun twist, stir in a handful after mixing. Walnuts, pecans, or even crushed peppermint candies work great.
I love how flexible this recipe is. If you’re out of one type of chocolate, you can mix and match. If you want a vegan option, swap the butter and use dairy-free chocolate chips and condensed coconut milk. No matter how you customize, you’ll still get perfect fudge every time.
The best part? These are all pantry staples. No need to hunt down any hard-to-find ingredients, and substitutions are easy. Whether you’re making this fudge for the first time or the hundredth, you’ll appreciate how simple—and forgiving—this recipe is.
Equipment Needed
You don’t need a fancy kitchen to make this chocolate fudge recipe! Here’s everything you’ll want on hand:
- Medium Saucepan: For melting the chocolate and mixing in the other ingredients. If you don’t have one, a microwave-safe bowl works in a pinch (just heat in 30-second bursts and stir well).
- Spatula or Wooden Spoon: A silicone spatula is my favorite for scraping every last bit out of the pan. You can use a wooden spoon if that’s what you have.
- 8×8 Inch Baking Pan (20x20cm): This gives the fudge a classic thickness. If you only have a loaf pan, your fudge will be thicker, but still delicious!
- Parchment Paper or Aluminum Foil: For lining the pan and making removal easy. I’ve used both, and parchment is a little easier to peel off.
- Sharp Knife: For cutting smooth squares once the fudge is set. If your knife sticks, run it under warm water first.
If you want perfectly neat edges, a bench scraper is handy—but honestly, a regular kitchen knife works just fine. As for cleanup, I always soak my saucepan right after—saves you from scrubbing dried chocolate later! Most of these tools are budget-friendly, and you probably have them already.
Preparation Method
- Line Your Pan: Line an 8×8 inch (20x20cm) baking pan with parchment paper or foil, leaving a little overhang for easy removal. This step makes a world of difference when you’re ready to cut and serve.
- Melt the Chocolate & Butter: In a medium saucepan over low heat, add 2 cups (340g) of chocolate chips and 2 tablespoons (28g) of unsalted butter. Stir constantly with a spatula to prevent burning. You’ll notice the chocolate turning glossy as it melts—don’t rush, or it may seize.
- Add Sweetened Condensed Milk: Once the chocolate and butter are melted and smooth, pour in 1 can (14 oz / 396g) of sweetened condensed milk. Stir until fully combined and the mixture thickens slightly. The fudge base should be silky and pull away from the sides.
- Optional Add-Ins: If desired, mix in 1 teaspoon vanilla extract or a pinch of salt. For extras like nuts, dried fruit, or marshmallows, fold them in now. Be gentle! You don’t want to crush your add-ins.
- Pour & Smooth: Quickly pour the fudge mixture into your lined pan. Use the spatula to spread it evenly—work fast, as the fudge will start setting as it cools. Tap the pan lightly on the counter to remove air bubbles.
- Chill: Transfer the pan to the refrigerator and let it set for at least 2 hours (or up to overnight for firmer fudge). Resist the urge to peek too soon—fudge needs time to firm up!
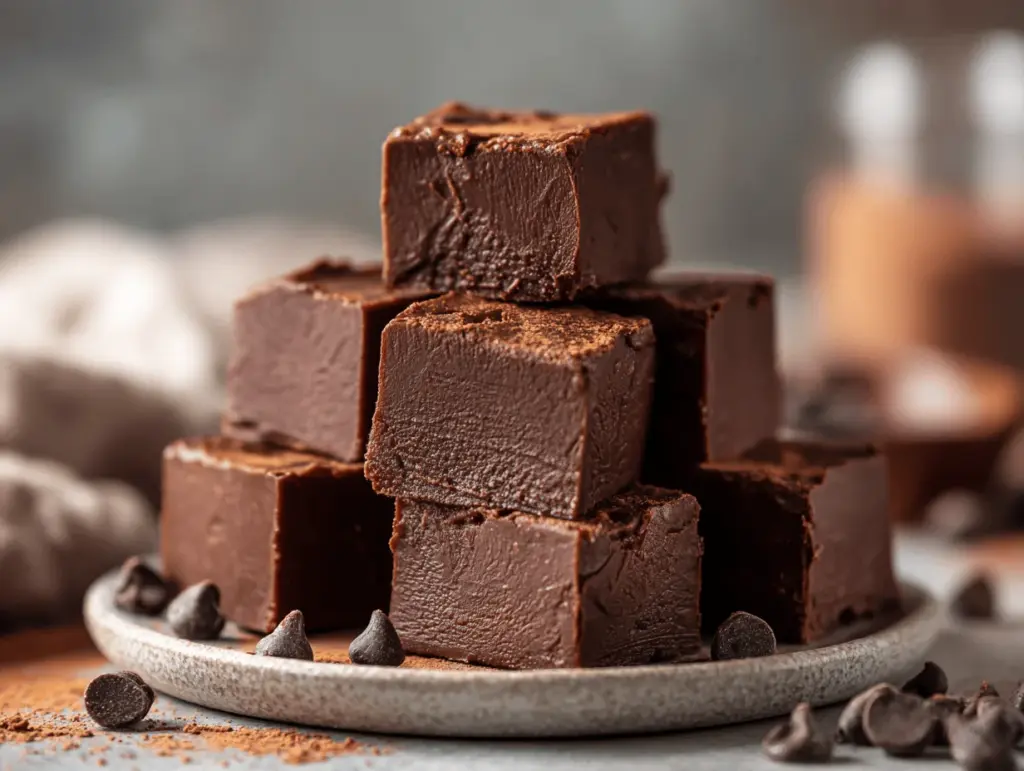
- Cut & Serve: Once fully set, lift the fudge out using the parchment overhang. Cut into 1-inch (2.5cm) squares with a sharp knife. If the knife sticks, run it under hot water and wipe dry between cuts.
Prep Notes: If your chocolate seizes (gets grainy), it’s usually from water getting into the pan or overheating. Start over if needed—trust me, I’ve been there! You can melt the chocolate mixture in the microwave if you’re short on time, just heat in 30-second bursts and stir well between each.
The fudge should look glossy and feel soft but firm when pressed lightly. If it’s too soft, chill a bit longer. If it’s too hard, you may have cooked it too long—try shortening the cook time next batch. Efficiency tip: Measure out all ingredients before you start so you’re not scrambling mid-recipe!
Cooking Tips & Techniques
After dozens of batches, here’s what I’ve learned about making chocolate fudge that’s consistently perfect:
- Low and Slow: Always melt your chocolate over low heat. Rushing with high heat can scorch the chocolate or cause it to seize. Patience pays off in creamy fudge!
- Use Fresh Ingredients: Old chocolate chips can develop a white coating (“bloom”)—they’ll still work, but flavor and texture are better with fresh.
- Don’t Skip the Lining: Trust me, trying to pry fudge out of an unlined pan is frustrating. Parchment paper = easy removal and less mess.
- Cut When Cold: Let the fudge chill completely before slicing for clean, neat squares. If you try to cut too soon, it’ll stick or crumble.
- Mix-Ins Last: If you’re adding nuts, marshmallows, or fruit, stir them in after the fudge base is smooth. They’ll stay crunchy and colorful.
Common mistakes? Overheating the chocolate is number one. I’ve burned a few pans myself (it smells awful and is tough to salvage). Another is using evaporated milk instead of sweetened condensed—your fudge won’t set, and it’ll taste bland. Multitasking tip: While the fudge chills, clean up your kitchen or prep toppings for serving.
For consistent results, use the same pan and measure ingredients carefully (I use a digital scale for chocolate chips—makes a difference!). If you want extra glossy fudge, add a half teaspoon of coconut oil with the butter. Honestly, the best fudge is made with a little love and a whole lot of chocolate!
Variations & Adaptations
This chocolate fudge recipe is endlessly adaptable! Here are some of my favorite ways to switch things up:
- Vegan/Dairy-Free: Swap regular chocolate chips for dairy-free chips, use vegan butter or coconut oil, and condensed coconut milk instead of standard condensed milk. It’s just as creamy and delicious!
- Nutty Crunch: Stir in 1/2 cup (60g) chopped walnuts, almonds, or pecans right before pouring into the pan. This gives the fudge a satisfying crunch and extra flavor.
- Festive Flavors: Add 1/2 cup (60g) crushed peppermint candies or swirl in a tablespoon of peanut butter. I’ve made a batch with orange zest and dried cranberries for holiday trays—huge hit!
- Low-Sugar: Use dark chocolate chips (70% cacao or higher) and unsweetened condensed milk. The fudge will be less sweet but still super rich.
- Allergen-Friendly: For nut-free fudge, skip any nut add-ins. For gluten-free, check your chocolate chips and condensed milk labels (most are safe, but always double-check).
One of my favorite personal twists is stirring in a handful of mini marshmallows and a dash of sea salt. It’s like a bite-sized s’mores treat! Feel free to get creative—this recipe is forgiving and fun to experiment with. Try coconut flakes, dried cherries, or even espresso powder for a grown-up kick.
Serving & Storage Suggestions
Chocolate fudge is best enjoyed at room temperature—let it sit out for 10-15 minutes after chilling for optimal texture. Arrange squares on a pretty platter or stack them in a jar as a gift (tie with a ribbon for bonus points!).
Pair with a cup of coffee, chai tea, or a glass of cold milk—trust me, it’s the perfect combo. For parties, serve fudge with fresh berries or alongside salty snacks for contrast. Sometimes I add a sprinkle of flaky sea salt right before serving for a flavor boost.
To store, keep fudge in an airtight container in the refrigerator for up to 2 weeks. For longer storage, freeze in a freezer-safe bag for up to 2 months. Thaw overnight in the fridge and bring to room temp before serving. The flavor deepens and the texture stays creamy even after chilling, so don’t worry about it drying out.
If reheating, avoid the microwave—fudge can melt into a puddle. Instead, let it sit at room temp or gently warm in the oven (low heat, covered). The flavors seem to get even better after a day or two, making this a great recipe to make ahead for busy weeks or special occasions.
Nutritional Information & Benefits
Each 1-inch (2.5cm) square contains approximately:
- Calories: 120
- Fat: 6g
- Carbohydrates: 15g
- Sugar: 13g
- Protein: 1g
Key ingredients like chocolate chips bring antioxidants and mood-boosting properties (sometimes you just need a little chocolate therapy!). Sweetened condensed milk adds calcium, and if you use dark chocolate, you’ll get extra minerals and less sugar. This recipe is naturally gluten-free, and with simple swaps it can be made dairy-free or nut-free.
Always check your chocolate chip and condensed milk labels for allergen info. Personally, I love knowing exactly what goes into my treats—no mystery ingredients or preservatives. Chocolate fudge isn’t exactly a health food, but as an occasional treat, it’s pure happiness in a bite. Moderation is key, and a small square is all it takes to satisfy those cravings!
Conclusion
The ultimate 3 ingredient chocolate fudge recipe is proof that you don’t need complicated steps or fancy equipment to make something truly amazing. Rich, creamy, and packed with chocolate flavor, it’s a guaranteed crowd-pleaser you’ll want to make again and again.
Feel free to customize the recipe with your favorite mix-ins or swap ingredients to suit your needs. That’s the beauty of homemade fudge—you’re in control, and every batch can be uniquely yours. Personally, I love how this fudge brings people together, whether it’s for a cozy night in or a festive celebration.
So go ahead, give this chocolate fudge recipe a try and let me know how it turns out! Share your twists, favorite add-ins, or even your fudge fails (we’ve all had them). Leave a comment below, pin it for later, or tag me on social media—I love seeing your creations. Here’s to effortless indulgence and sweet moments, one square at a time!
Frequently Asked Questions
Can I make chocolate fudge without butter?
Yes! You can use coconut oil or vegan butter instead. The texture stays creamy, and it adds a subtle flavor twist.
How long does homemade fudge last?
Stored in an airtight container in the fridge, fudge lasts up to 2 weeks. You can also freeze it for up to 2 months.
Why did my fudge turn grainy?
This usually happens if the chocolate is overheated or water gets into the mix. Melt chocolate slowly and keep everything dry for best results.
Can I use white chocolate chips?
Absolutely! White chocolate fudge is delicious, just follow the same steps. You can even swirl in peanut butter or fruit for variety.
Is this recipe gluten-free?
Yes, as long as your chocolate chips and condensed milk are gluten-free (most brands are). Always double-check labels if you have sensitivities.
Pin This Recipe!

Chocolate Fudge Recipe: Easy 3 Ingredient Homemade Treat
- Total Time: 2 hours 15 minutes
- Yield: 36 squares 1x
Description
This ultra-creamy chocolate fudge melts in your mouth and comes together with just three simple ingredients—no candy thermometer or complicated steps required. Perfect for gifting, sharing, or indulging, it’s a quick and satisfying treat for any occasion.
Ingredients
- 2 cups (12 oz) semi-sweet or dark chocolate chips
- 1 can (14 oz) sweetened condensed milk
- 2 tablespoons unsalted butter (or coconut oil/vegan butter for dairy-free)
- Optional: 1 teaspoon vanilla extract
- Optional: Pinch of salt
- Optional: 1/2 cup chopped nuts, dried fruit, mini marshmallows, or crushed peppermint candies
Instructions
- Line an 8×8 inch baking pan with parchment paper or foil, leaving an overhang for easy removal.
- In a medium saucepan over low heat, melt the chocolate chips and butter together, stirring constantly until smooth and glossy.
- Add the sweetened condensed milk and stir until fully combined and the mixture thickens slightly.
- If desired, stir in vanilla extract, salt, or mix-ins like nuts, dried fruit, or marshmallows.
- Quickly pour the fudge mixture into the lined pan and spread evenly with a spatula. Tap the pan lightly to remove air bubbles.
- Refrigerate for at least 2 hours, or until firm (overnight for firmer fudge).
- Lift the fudge out using the parchment overhang and cut into 1-inch squares with a sharp knife (run knife under hot water for clean cuts).
Notes
For best results, melt chocolate slowly over low heat and avoid getting water in the pan. Use fresh chocolate chips for optimal flavor and texture. Fudge can be customized with mix-ins like nuts, dried fruit, or marshmallows. Store in an airtight container in the fridge for up to 2 weeks or freeze for up to 2 months. Let fudge sit at room temperature for 10-15 minutes before serving for best texture.
- Prep Time: 10 minutes
- Cook Time: 5 minutes
- Category: Dessert
- Cuisine: American
Nutrition
- Serving Size: 1 square (about 1-inch)
- Calories: 120
- Sugar: 13
- Sodium: 25
- Fat: 6
- Saturated Fat: 4
- Carbohydrates: 15
- Fiber: 1
- Protein: 1
Keywords: chocolate fudge, easy fudge, 3 ingredient fudge, homemade fudge, quick dessert, gluten-free fudge, dairy-free fudge, holiday treat, potluck dessert, chocolate recipe