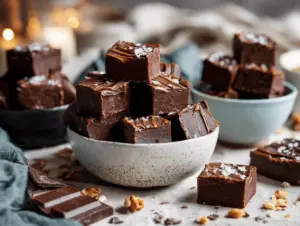
Let’s be real—there’s something absolutely magical about cake batter anything. The sweet, creamy scent, the playful sprinkles, and that soft, nostalgic taste of birthday celebrations (no matter the season). I’ll never forget the first time I made cake batter fudge during a chilly autumn weekend. The leaves were just turning gold, my kitchen smelled like vanilla heaven, and my kids couldn’t wait to sneak a piece before it even set! This cake batter fudge recipe isn’t just about satisfying your sweet tooth—it’s a slice of fall comfort, wrapped up in easy-to-make dessert squares that scream “cozy.”
I’ve tested this recipe more times than I can count—sometimes swapping out flavors, sometimes adding extra sprinkles for my youngest (who claims “more is always better!”). Each time, the results are rich, creamy, and perfectly chewy with a little crunch from those classic rainbow bits. Honestly, if you’re searching for the perfect fall dessert squares, this cake batter fudge recipe is about to become your new favorite.
Whether you’re celebrating a birthday, looking for a quick treat for a potluck, or just want something fun to make with the family, you’ll find these fudge squares hit all the right notes. They’re simple, customizable, and oh-so-delicious. Plus, with only a handful of pantry staples and a few minutes of prep, you can whip up a batch faster than a pumpkin spice latte disappears in October!
As someone who’s spent years baking and recipe testing, I can promise you: this cake batter fudge is foolproof, festive, and truly irresistible. Ready to make your kitchen smell amazing and your dessert table pop? Let’s dive in and discover why these fall dessert squares should be your next bake!
Why You’ll Love This Cake Batter Fudge Recipe
- Quick & Easy: Whips up in about 15 minutes (plus chill time)—no oven required, so it’s perfect for busy days or spontaneous sweet cravings.
- Simple Ingredients: No need for fancy shopping trips. You probably have everything you need (or close substitutes) in your pantry right now.
- Perfect for Any Occasion: These dessert squares are a hit for fall parties, Halloween gatherings, Friendsgiving, or just cozy nights in.
- Crowd-Pleaser: I’ve served these to picky kids, skeptical adults, and even my dessert-snob best friend—everyone asks for seconds!
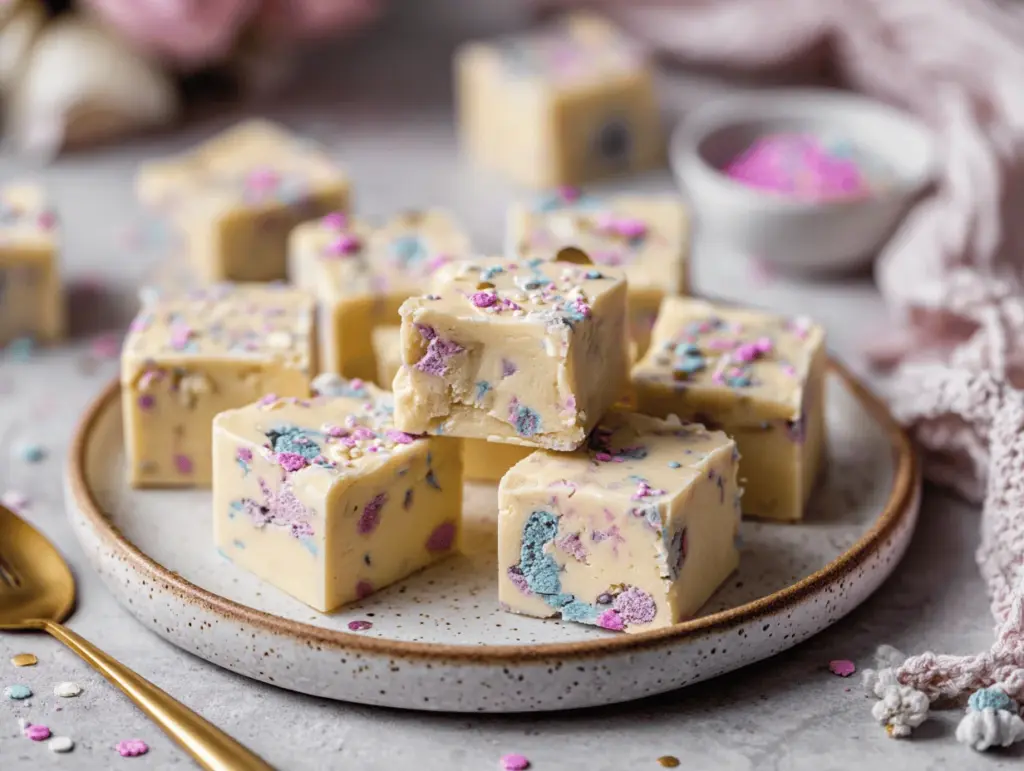
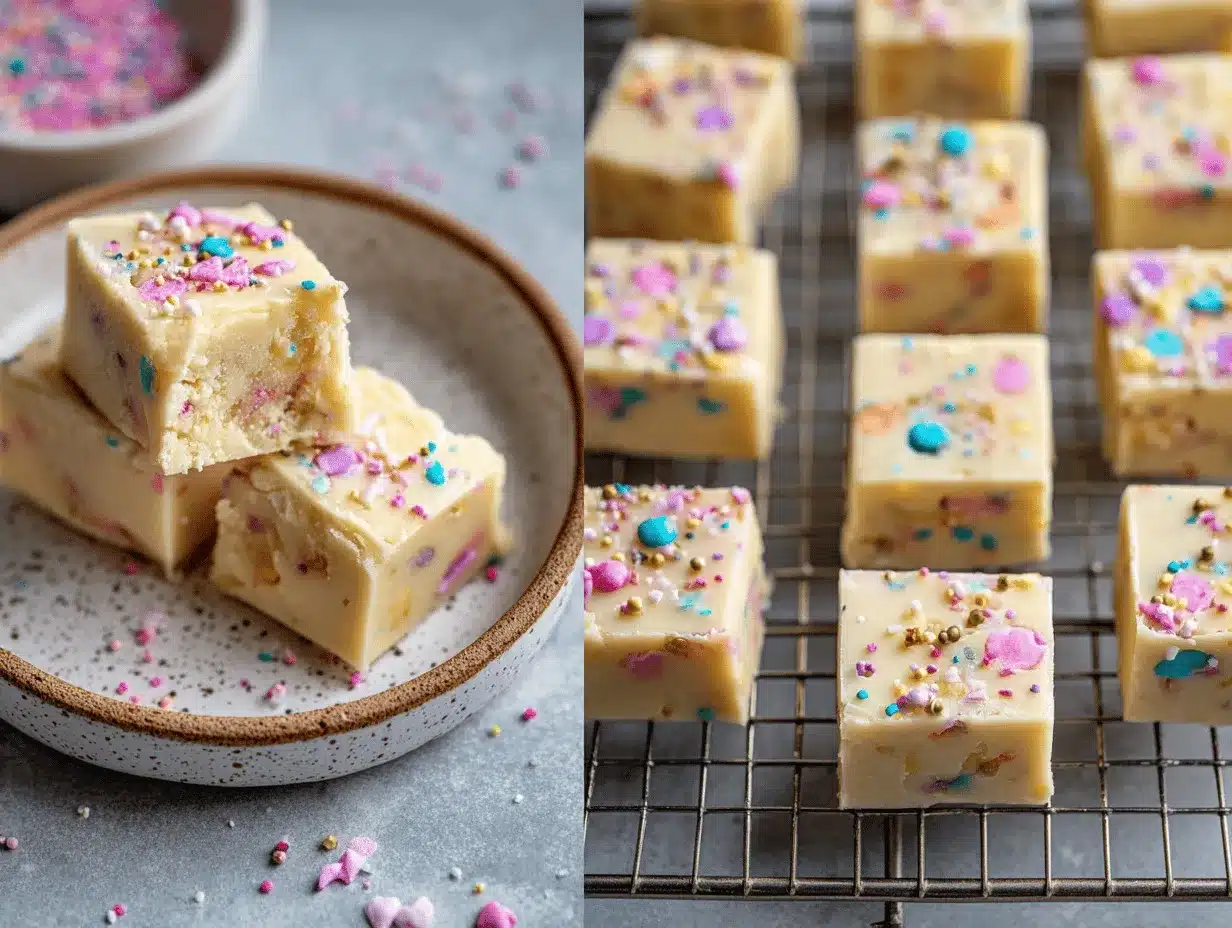
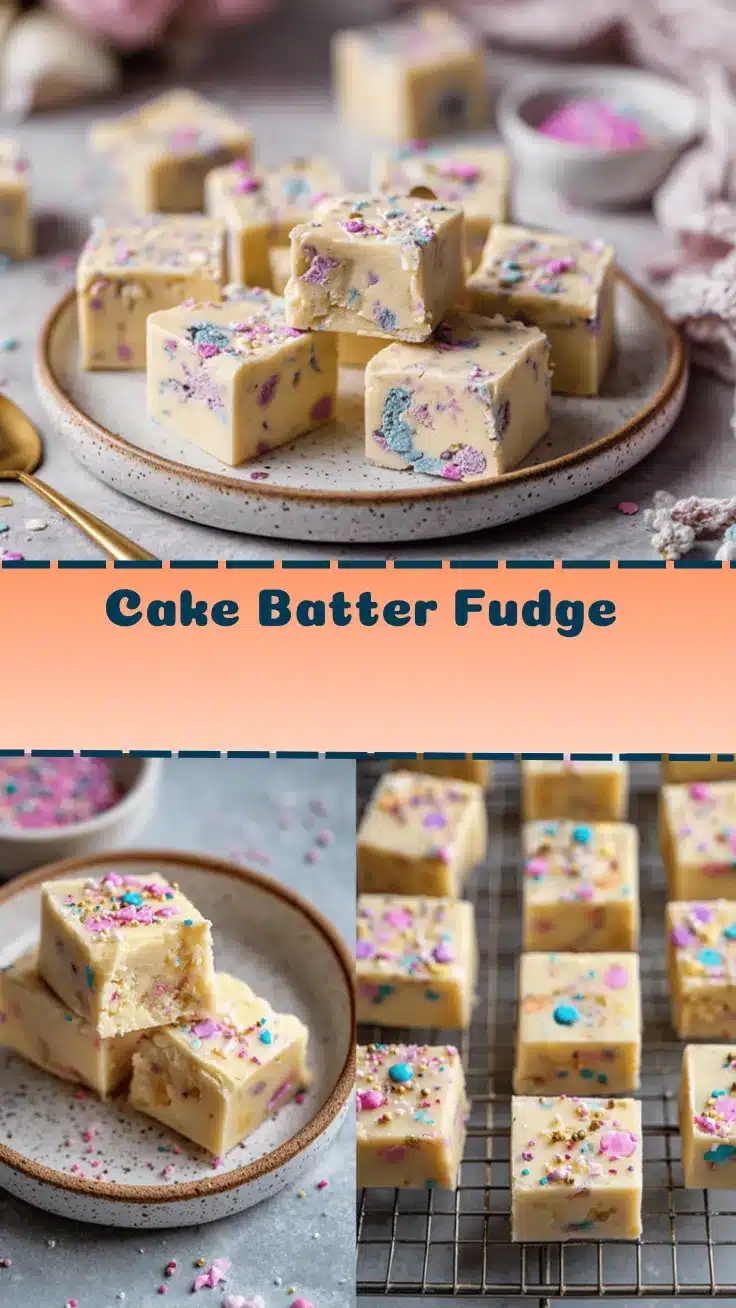
- Unbelievably Delicious: The texture is smooth and creamy, with a melt-in-your-mouth finish. Sprinkles give a little crunch, and the flavor is pure cake batter bliss.
This cake batter fudge recipe stands out because it uses actual cake mix for that classic flavor—honestly, nothing else hits the spot quite the same way. I always blend the fudge base until it’s extra smooth, and I fold in sprinkles at just the right moment so they don’t melt or bleed. These little tricks make every square picture-perfect and super tasty.
What sets this version apart? It’s not just sweet—it’s balanced, with a gentle vanilla depth, a touch of salt, and a playful texture. Plus, you can easily make it gluten-free or dairy-free if needed (I’ve tried both!). If you’ve ever closed your eyes after a bite of dessert and just sighed, you know what I mean—this fudge delivers that “wow, I need another piece” feeling every single time.
Whether you’re hoping to impress guests, treat your family, or just celebrate the joy of baking, these fall dessert squares are a guaranteed win. They bring smiles, satisfy cravings, and make your home feel extra cozy—all without the stress or mess of traditional fudge recipes.
Ingredients Needed for Cake Batter Fudge
This recipe relies on a handful of simple, pantry-friendly ingredients that come together for that classic cake batter flavor. If you’re missing an item, don’t stress—I’ve included easy swaps and tips to make sure your fudge turns out just right!
- White cake mix (1 cup / 120g) – The secret to authentic cake batter taste; use your favorite brand. If you’re gluten-sensitive, a gluten-free cake mix works perfectly!
- Powdered sugar (2 cups / 240g) – Creates that melt-in-your-mouth texture. I prefer organic, but any kind works.
- Unsalted butter (½ cup / 113g), cut into cubes – Adds richness and helps everything set up nicely.
- Whole milk (¼ cup / 60ml) – Makes the fudge creamy. You can swap in almond or oat milk for a dairy-free version.
- Pure vanilla extract (1 tsp / 5ml) – For that classic bakery aroma and flavor.
- Salt (¼ tsp / 1g) – Just a pinch! It balances the sweetness and deepens the flavor.
- Rainbow sprinkles (½ cup / 75g) – Use classic jimmies or nonpareils. I like to add extra for color. If you’re making these for fall, try autumn-colored sprinkles for festive vibes!
Optional Add-Ins:
- White chocolate chips (¼ cup / 40g) – For extra richness.
- Chopped nuts (¼ cup / 30g) – Adds crunch (pecans or walnuts work great for fall).
- Mini marshmallows (¼ cup / 15g) – For gooey bites.
Ingredient Tips:
I usually stick with Pillsbury or Betty Crocker cake mix, but any brand will do. For an even smoother fudge, sift the cake mix and powdered sugar before mixing. If you’re short on powdered sugar, you can pulse granulated sugar in a blender until fine—it’s not perfect, but works in a pinch!
Don’t be afraid to mix up the sprinkles based on the season: golds and reds for fall, pastels for spring, or bold colors for birthdays. You can also swap in chocolate cake mix for a rich twist, but honestly, the classic vanilla cake batter is my personal favorite for these fudge squares.
Equipment Needed
- 8×8-inch (20x20cm) square baking pan – Lined with parchment for easy removal. If you don’t have one, a similar-sized dish works (just adjust thickness and cutting size).
- Microwave-safe mixing bowl – Makes melting butter and mixing everything super quick.
- Whisk or electric mixer – For blending the batter until smooth. I use a hand mixer when I want extra creamy fudge.
- Rubber spatula – Helps spread the fudge evenly and scrape the bowl clean (trust me, you’ll want every last bit!).
- Measuring cups and spoons – For accuracy and consistent results.
- Parchment paper – Essential for easy lifting and clean cuts.
If you don’t have a microwave, a small saucepan on the stovetop works fine for melting butter and milk—just keep the heat low and stir often. I’ve made these fudge squares in both glass and metal pans; both work, but metal gives slightly firmer edges. And if your spatula is looking a little worn, give it a soak in hot water with baking soda—it’ll be good as new!
Honestly, you don’t need fancy tools. I’ve even mixed this fudge with a wooden spoon when my mixer was buried under holiday baking supplies. The key is getting everything blended and smoothed out before adding sprinkles!
Preparation Method
- Prep your pan: Line an 8×8-inch (20x20cm) pan with parchment paper, leaving extra overhang for easy lifting later. Lightly grease the paper if you’re worried about sticking.
- Mix the dry ingredients: In a large bowl, combine 1 cup (120g) white cake mix and 2 cups (240g) powdered sugar. Whisk together until no lumps remain. (If your cake mix is clumpy, sift it first!)
- Melt the wet ingredients: Place ½ cup (113g) unsalted butter and ¼ cup (60ml) whole milk in a microwave-safe bowl. Microwave on high for 60-90 seconds, or until the butter is just melted and the mixture is hot but not boiling. (Watch closely—milk can bubble over!)
- Combine everything: Pour the hot butter-milk mixture into the dry ingredients. Add 1 tsp (5ml) vanilla extract and ¼ tsp (1g) salt. Mix well with a whisk or mixer until the batter is completely smooth and thick. (It should look glossy and feel like thick cake batter.)
- Fold in the sprinkles: Let the mixture cool for about 2 minutes—just enough so the sprinkles won’t melt. Gently fold in ½ cup (75g) rainbow sprinkles (reserve a few for topping, if you like).
- Spread and smooth: Pour the fudge mixture into your prepared pan. Use a rubber spatula to spread it evenly into the corners. Sprinkle any remaining sprinkles on top and gently press them in.
- Chill: Refrigerate for at least 2 hours, or until the fudge is firm. (If you’re impatient—like me sometimes—pop it in the freezer for 45 minutes instead.)
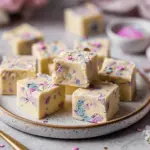
- Cut into squares: Lift the fudge out using the parchment overhang. Place on a cutting board and slice into 16 squares (or smaller bites for parties).
Prep Notes: If your fudge seems too soft, chill it longer. For super clean edges, dip your knife in hot water and wipe dry between cuts. Sometimes, the sprinkles will bleed—don’t worry, it just adds character! If you’re adding nuts or chocolate chips, fold them in with the sprinkles.
Troubleshooting tip: If your fudge is grainy, make sure the powdered sugar is well mixed and the butter-milk combo is hot enough to dissolve everything. If it’s sticky, just chill it longer. I’ve made this recipe in humid weather and dry—chilling time is everything!
Efficiency tip: Prep all your ingredients before you start. It makes the process smoother and you won’t risk missing a step (especially when kids are “helping”).
Cooking Tips & Techniques
I’ve picked up a few tricks after making cake batter fudge dozens of times. Here’s what works best (and what to watch out for):
- Don’t overheat the butter-milk mixture: If it’s too hot, the fudge may separate or the sprinkles can melt. Aim for “just melted”—think warm, not scalding.
- Mix swiftly but gently: Over-mixing can make the fudge dense. I usually whisk until combined, then switch to a spatula for folding in sprinkles and extras.
- Room temperature ingredients: If your butter is too cold, it won’t blend well. Let it sit out for 5-10 minutes before starting.
- Sprinkle timing matters: Add them after the fudge cools slightly or they’ll bleed into the batter. I learned this the hard way—my first batch was a swirl of rainbow colors (still tasty, just not as pretty).
- Multitask: While the fudge chills, clean up, prep serving plates, or whip up a quick fall beverage to go with your dessert squares.
If your fudge doesn’t set, don’t panic. It’ll firm up with extra chilling. If it’s dry, add a splash more milk next time. Sometimes, humidity messes with texture—store fudge in an airtight container to keep it at its best.
Consistency tip: Always measure your ingredients carefully. Even a little extra cake mix can make the fudge crumbly, while too much milk makes it sticky. I’ve learned to double-check before pouring—and it’s made all the difference.
Variations & Adaptations
One thing I love about cake batter fudge is how flexible it is. You can tweak the recipe to fit any taste, season, or dietary need. Here are my favorite ways to mix it up:
- Gluten-Free: Swap in your favorite gluten-free cake mix (I like King Arthur or Bob’s Red Mill). Everything else stays the same!
- Dairy-Free: Use plant-based butter and almond or oat milk. The texture is slightly softer but still delicious.
- Chocolate Lover’s Version: Substitute chocolate cake mix and add mini chocolate chips instead of sprinkles. My husband loves this twist in winter.
- Fall Spice: Add ½ tsp ground cinnamon and swap in pumpkin-flavored cake mix for a seasonal spin. Toss in some chopped pecans for crunch.
- Nut-Free: Just leave out the nuts—this recipe is naturally nut-free unless you add extras.
I’ve also tried swirling caramel sauce on top before chilling—wow, sweet and sticky in all the right ways! For birthdays, I use pastel sprinkles and top with edible glitter. For Halloween, orange and black sprinkles give a festive look. Don’t be afraid to experiment—this fudge is forgiving and fun!
Serving & Storage Suggestions
These cake batter fudge squares taste best slightly chilled or at room temperature. I usually serve them straight from the fridge—they’re firm, creamy, and easy to handle. Arrange on a pretty platter with extra sprinkles for color and watch them disappear!
Pair these dessert squares with a mug of spiced tea, hot cocoa, or your favorite fall latte. They’re also great alongside fruit (like apple slices or berries) for a lighter touch. For parties, I sometimes cut them into bite-size cubes and serve with toothpicks—super cute and mess-free.
Storage: Place fudge squares in an airtight container with parchment between layers. Store in the fridge for up to 1 week. For longer storage, freeze them for up to 2 months—just thaw in the fridge overnight. To reheat (if needed), microwave for 5-10 seconds per square (not too long or they’ll melt!).
The flavors actually deepen after a day or two in the fridge—the vanilla and butter get richer, and the texture becomes even creamier. If your fudge seems dry after freezing, let it sit at room temp for a few minutes to soften.
Nutritional Information & Benefits
| Serving Size | Calories | Fat | Carbs | Protein |
|---|---|---|---|---|
| 1 square (1/16th of batch) | Approx. 150 | 8g | 20g | 2g |
This cake batter fudge recipe is a fun treat, so enjoy in moderation. The main health benefit comes from mindful ingredient swaps—using gluten-free or dairy-free options as needed. If you add nuts, you’ll get a little extra protein and healthy fats.
Potential allergens include wheat (cake mix), dairy (butter, milk), and eggs (sometimes in cake mix—check your brand). For lower sugar, try using a sugar-free cake mix and powdered sugar substitute (I’ve tested it—texture’s a bit different, but still tasty).
I love making these fudge squares as part of a balanced treat routine—sharing with friends, enjoying after a walk, or as a reward after a busy day. Homemade always feels better than store-bought, and you can control every ingredient!
Conclusion
So, why make this cake batter fudge recipe? It’s easy, fun, and delivers big on taste and nostalgia. You get creamy, colorful, fall dessert squares everyone loves—from little kids to grown-ups with serious sweet cravings. It’s my go-to when I want something quick but impressive, and honestly, it never disappoints.
Feel free to tweak the recipe to your liking—try new flavors, swap in your favorite sprinkles, or make it gluten-free. That’s the joy of baking at home! I hope you love this recipe as much as my family and friends do. If you try it, let me know in the comments—share your creative twists, your best fudge photos, or your funniest kitchen stories. I’d love to hear how it turns out for you!
Get baking, share the sweetness, and remember: the best desserts are the ones you make your own. Happy fall, and happy fudge making!
Frequently Asked Questions
Can I use a different flavor of cake mix for this fudge?
Absolutely! You can swap in chocolate, funfetti, or even spice cake mix. Each version will have its own unique flavor—just follow the same measurements and process.
Do I need to bake the cake mix before using it?
No baking required for this fudge recipe. The cake mix blends in with the melted butter and milk, creating a safe and delicious base.
Can I make cake batter fudge without a microwave?
Yes! Melt the butter and milk together in a small saucepan over low heat, stirring constantly. Then follow the rest of the recipe as usual.
How do I keep the sprinkles from melting into the fudge?
Let the fudge mixture cool for 2-3 minutes before adding sprinkles. Gently fold them in—they’ll keep their color and crunch.
Is this recipe safe for people with nut allergies?
This cake batter fudge is nut-free unless you add nuts as a variation. Always check your cake mix ingredients, and use sprinkles labeled as nut-free for extra safety.
Pin This Recipe!
Cake Batter Fudge Recipe – Easy Fall Dessert Squares You’ll Love
- Total Time: 2 hours 20 minutes (includes chilling)
- Yield: 16 squares 1x
Description
This cake batter fudge is a quick, no-bake fall dessert made with white cake mix, sprinkles, and pantry staples. Creamy, chewy, and festive, these squares are perfect for parties or cozy nights in.
Ingredients
- 1 cup white cake mix (120g)
- 2 cups powdered sugar (240g)
- 1/2 cup unsalted butter, cut into cubes (113g)
- 1/4 cup whole milk (60ml)
- 1 teaspoon pure vanilla extract (5ml)
- 1/4 teaspoon salt (1g)
- 1/2 cup rainbow sprinkles (75g)
- Optional: 1/4 cup white chocolate chips (40g)
- Optional: 1/4 cup chopped nuts (30g)
- Optional: 1/4 cup mini marshmallows (15g)
Instructions
- Line an 8×8-inch pan with parchment paper, leaving extra overhang for easy lifting. Lightly grease the paper if desired.
- In a large bowl, whisk together the cake mix and powdered sugar until no lumps remain. Sift if needed.
- Place butter and milk in a microwave-safe bowl. Microwave on high for 60-90 seconds, until butter is melted and mixture is hot but not boiling.
- Pour the hot butter-milk mixture into the dry ingredients. Add vanilla extract and salt. Mix with a whisk or mixer until smooth and thick.
- Let the mixture cool for about 2 minutes. Gently fold in the sprinkles (and any optional add-ins). Reserve a few sprinkles for topping if desired.
- Spread the fudge mixture evenly into the prepared pan using a rubber spatula. Sprinkle remaining sprinkles on top and gently press in.
- Refrigerate for at least 2 hours, or until firm. For faster setting, freeze for 45 minutes.
- Lift fudge out using parchment overhang. Cut into 16 squares (or smaller bites for parties).
Notes
For gluten-free, use gluten-free cake mix. For dairy-free, use plant-based butter and non-dairy milk. Add sprinkles after mixture cools slightly to prevent color bleeding. Chill longer for firmer fudge. Store in airtight container in fridge up to 1 week or freeze up to 2 months.
- Prep Time: 15 minutes
- Cook Time: 2 minutes (microwave melting)
- Category: Dessert
- Cuisine: American
Nutrition
- Serving Size: 1 square (1/16th of batch)
- Calories: 150
- Sugar: 18
- Sodium: 70
- Fat: 8
- Saturated Fat: 5
- Carbohydrates: 20
- Protein: 2
Keywords: cake batter fudge, fall dessert, easy fudge, no bake, birthday treat, party squares, sprinkles, vanilla fudge, gluten-free option, dairy-free option