Introduction
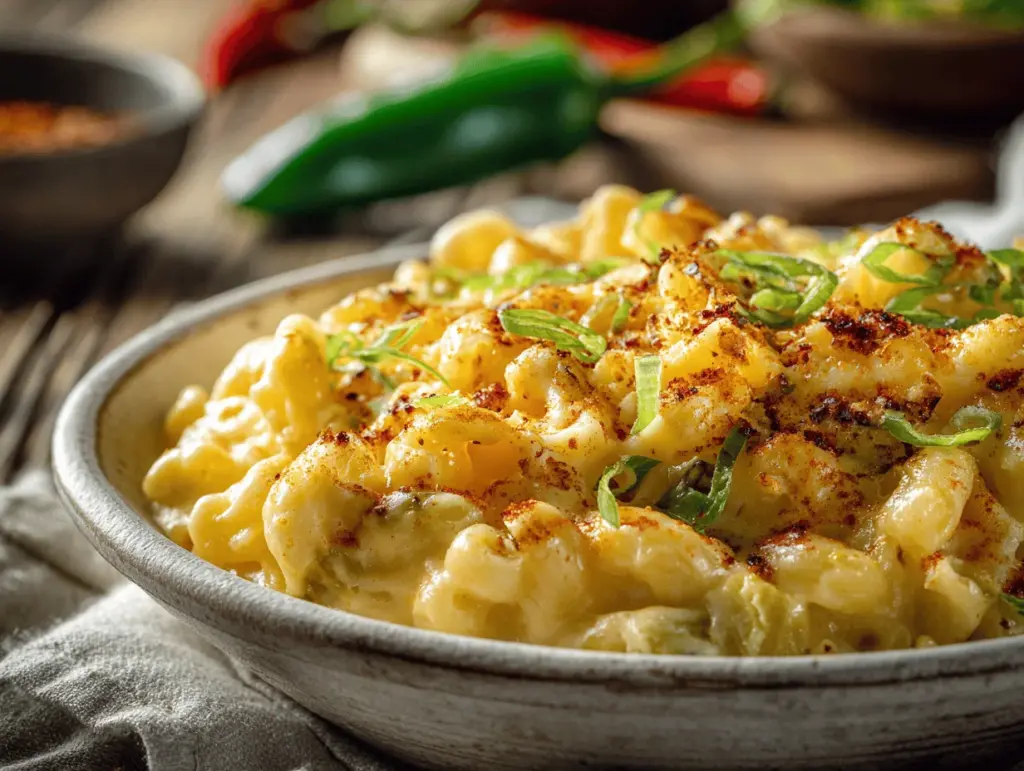
The first spoonful of this creamy Hatch chile mac and cheese hits you with a gentle heat—just enough to make things interesting. The sharp, nutty cheese melts into a velvety sauce, and those roasted Hatch chiles bring a smoky magic that makes you want a second helping. If you’ve ever found yourself craving something savory and comforting on a crisp fall evening, you’ll understand why this recipe is my go-to once autumn rolls around.
Honestly, I stumbled into this Hatch chile mac and cheese during one of those “what’s left in the fridge?” nights. I had a couple of roasted Hatch chiles and some elbow noodles (the classics never let me down), but I wanted something richer and a little more grown-up than the boxed stuff. That’s when I started tinkering—mixing cheeses, adding a splash of cream, and sneaking in those smoky chiles. Let’s face it: the kitchen is where the best accidents happen.
Hatch chiles aren’t just any pepper; they’re a seasonal treat. If you catch them fresh at the market (usually from August to October), it feels like you’ve found a little autumn treasure. Their mild heat and earthy flavor are perfect for anyone who likes their comfort food with a twist. Whether you’re cooking for a busy family, a group of hungry friends, or just yourself after a long day, this mac and cheese delivers all the creamy goodness you crave—with a savory kick. I’ve tested this recipe more times than I care to admit, and it’s become a staple in my fall recipe rotation. If you’re ready to cozy up with something truly special, keep reading; this is the Hatch chile mac and cheese recipe you’ll want to bookmark.
Why You’ll Love This Recipe
- Quick & Easy: Ready in under 45 minutes, so you won’t be stuck in the kitchen when all you want is to curl up with a bowl of comfort.
- Simple Ingredients: No need to hunt down exotic cheeses or fancy pastas. Most of this stuff is probably lurking in your pantry or fridge.
- Perfect for Autumn Gatherings: This savory mac and cheese is the kind of dish that draws everyone to the table. Think potluck, game night, or just a cozy dinner with the people you love.
- Crowd-Pleaser: Kids dig the creamy cheese, adults love the subtle heat from Hatch chiles, and picky eaters almost always ask for seconds.
- Unbelievably Delicious: The combination of gooey cheese, tender pasta, and smoky chiles is just next-level comfort food. Trust me—one bite, and you’ll know.
This isn’t your average mac and cheese. The trick is blending the Hatch chiles into the sauce—so you get that smooth, creamy texture with flecks of green and little bursts of flavor. I’ve tried all sorts of cheese combos, but the mix of sharp cheddar and nutty Gruyère gives this recipe a depth you don’t get from just one cheese. Plus, a hint of garlic and a dash of smoked paprika make it sing.
What really sets this apart is how it balances comfort and excitement. It’s the kind of dish that makes you close your eyes after the first bite, savoring not just the flavors but the memories that come with them. For me, it’s the ultimate autumn dinner—something you can whip up without stressing over complicated steps or expensive ingredients. It’s a warm hug, a savory treat, and a little taste of fall in every forkful.
If you want a mac and cheese that’s more than just cheese and noodles—something with a little soul, a little spice, and a whole lot of heart—this savory creamy Hatch chile mac and cheese is it.
Ingredients Needed
This recipe uses simple, wholesome ingredients to deliver bold flavor and a satisfying texture without a lot of fuss. Most are pantry staples, but the Hatch chiles bring that seasonal, autumn magic.
- For the Pasta:
- 12 ounces (340g) elbow macaroni (or any short pasta—cavatappi and shells work great too)
- Salt, for boiling water
- For the Sauce:
- 2 tablespoons (28g) unsalted butter (adds richness)
- 2 tablespoons (16g) all-purpose flour (for thickening)
- 2 cups (480ml) whole milk (or half-and-half for extra creaminess)
- 1/2 cup (120ml) heavy cream (optional, but makes it ultra-smooth)
- 2-3 roasted Hatch chiles, chopped (about 4 ounces/110g; mild or hot, depending on your heat preference)
- 1/2 teaspoon garlic powder (or 1 clove fresh garlic, finely minced)
- 1/2 teaspoon smoked paprika (for a subtle smoky flavor)
- 1/4 teaspoon black pepper
- 1/4 teaspoon kosher salt (plus more to taste)
- 2 cups (200g) sharp cheddar cheese, shredded (I love Tillamook for the best melt)
- 1 cup (100g) Gruyère cheese, shredded (adds nutty depth)
- 1/2 cup (50g) Monterey Jack cheese, shredded (for a gooey finish)
- For the Topping (Optional but so good):
- 1/2 cup (50g) panko breadcrumbs
- 1 tablespoon (14g) unsalted butter, melted
- 1 tablespoon chopped fresh parsley (for a fresh pop)
Ingredient Tips: Look for firm, bright green Hatch chiles for the best flavor. If you can’t find fresh ones, canned roasted Hatch chiles work perfectly. For gluten-free, swap the pasta and flour for gluten-free versions—Bob’s Red Mill makes a great 1:1 baking flour. Need dairy-free? Sub in your favorite plant-based milk and cheese (Violife cheddar shreds melt well).
Feel free to mix up the cheese combo; I sometimes swap Gruyère for fontina or use extra Monterey Jack when I want things super gooey. If you’re feeling adventurous, add a handful of crispy cooked bacon or caramelized onions for even more savory depth.
Equipment Needed
- Large pot (for boiling pasta)
- Colander (for draining pasta)
- Medium saucepan (for making the cheese sauce)
- Whisk (essential for smooth, lump-free sauce)
- Wooden spoon or spatula (for stirring)
- 8×8-inch (20x20cm) baking dish or similar (if baking with the breadcrumb topping)
- Cheese grater (freshly grated cheese melts better)
- Measuring cups and spoons
If you don’t have a whisk, a fork works in a pinch—just whisk with a little extra muscle. I’ve baked this in everything from deep pie dishes to cast iron skillets; anything oven-safe and about the right size will do. For budget-friendly options, basic stainless steel pots and glass baking dishes work great (I use my trusty Pyrex more than anything else). Cheese graters are worth the small investment; hand-grating gives the creamiest sauce.
Keep your whisk clean by rinsing it right after making the sauce—cheese can get sticky! If you love crispy toppings, a broiler-safe dish lets you finish your mac and cheese with a golden crunch.
Preparation Method
- Prep and Cook the Pasta:
- Bring a large pot of salted water to a boil. Add the elbow macaroni and cook until al dente—about 7-8 minutes (check package instructions for precision).
- Drain pasta and set aside. Toss with a splash of olive oil if you want to keep it from sticking. (Pasta should be tender but still have a little bite.)
- Roast and Prepare Hatch Chiles (if using fresh):
- Preheat your oven to 450°F (230°C). Place whole Hatch chiles on a baking sheet and roast for 10 minutes, turning halfway through, until skins blister and blacken.
- Transfer chiles to a bowl, cover with plastic wrap, and let steam for 5 minutes (makes peeling easier).
- Peel, remove seeds, and chop chiles. (Wear gloves if you’re sensitive to pepper oils.)
- Make the Cheese Sauce:
- In a medium saucepan over medium heat, melt 2 tablespoons butter until foamy.
- Whisk in 2 tablespoons flour and cook, stirring, for 1 minute. The mixture should bubble but not brown. This is your roux!
- Slowly pour in 2 cups milk and whisk constantly to avoid lumps. Once smooth, add 1/2 cup heavy cream for extra richness.
- Add chopped Hatch chiles, garlic powder, smoked paprika, black pepper, and salt. Stir and simmer for 2-3 minutes, letting flavors meld.
- Reduce heat to low. Gradually stir in cheddar, Gruyère, and Monterey Jack cheeses—handful by handful—until fully melted and sauce is creamy. (If sauce looks too thick, add a splash more milk. If too thin, let simmer for a minute.)
- Combine Pasta and Sauce:
- Add drained pasta to the sauce. Fold gently until noodles are evenly coated in the creamy Hatch chile cheese sauce.
- Taste and adjust seasoning—add more salt or chiles if you want extra heat.
- Prepare the Topping (Optional):
- In a small bowl, mix panko breadcrumbs with melted butter. Sprinkle evenly over the mac and cheese in your baking dish.
- Top with chopped parsley for a bit of color.
- Bake (Optional for Crispy Top):
- Preheat oven to 375°F (190°C). Bake mac and cheese for 18-20 minutes until bubbly and golden. (For a super-crispy topping, broil for the last 2-3 minutes—watch closely so it doesn’t burn.)
- Let cool for 5 minutes before serving. The sauce thickens as it sits!
Personal Tip: If your sauce gets grainy, heat it gently and whisk in a splash of milk. If cheese isn’t melting smoothly, try grating it finer next time. I’ve learned that patience with the roux and slow cheese addition makes all the difference. And honestly, don’t skip the Hatch chiles—they’re what makes this mac and cheese a true autumn comfort classic.
Cooking Tips & Techniques
Getting mac and cheese just right takes a little know-how—and a touch of patience. Here are my top tips from years of kitchen trial and error:
- Don’t Overcook the Pasta: Stop at al dente! Overcooked noodles turn mushy once baked in sauce.
- Roux Matters: Cook flour and butter together for at least 1 minute to avoid a raw taste. The bubbling signals it’s ready for milk.
- Gradual Cheese Addition: Add cheese slowly, stirring after each addition. This helps the sauce stay smooth and creamy (I learned this the hard way—dumping cheese in all at once can make it stringy).
- Watch the Heat: Cheese sauce should never boil. Too much heat can separate the cheese, resulting in a grainy texture.
- Season as You Go: Taste after adding the Hatch chiles and cheese. Sometimes the chiles are spicier than expected; adjust to your liking.
- Breadcrumbs for Crunch: Panko gives the best crispy topping, but regular breadcrumbs work too. Mix with melted butter for golden results.
- Multitasking Strategy: While the pasta boils, roast or chop your chiles and grate the cheese. This saves time and makes for a smoother cooking flow.
- Common Mistakes: Skipping the roux step, using pre-shredded cheese (coated with anti-caking agents that don’t melt as well), or letting the sauce boil. Trust me, I’ve tried shortcuts—they don’t pay off.
Honestly, the secret is in the details—don’t rush the sauce, and always go for freshly grated cheese if you can. If you ever end up with a broken sauce, whisk in a little cold milk off the heat. I’ve had my share of lumpy mac and cheese, and that trick usually saves the day!
Variations & Adaptations
There’s no one way to enjoy Hatch chile mac and cheese, so let’s talk swaps and tweaks. I love how flexible this recipe is—here are some of my favorite variations:
- Gluten-Free: Use your favorite gluten-free pasta and swap the all-purpose flour for a 1:1 gluten-free blend. I’ve used Jovial brown rice pasta and Bob’s Red Mill flour—both work beautifully.
- Vegetarian: Skip any meaty add-ins and boost flavor with caramelized onions or sautéed mushrooms. These add a lovely umami depth alongside the Hatch chiles.
- Low-Carb: Substitute pasta with cooked cauliflower florets. The cheese sauce still coats them perfectly, and you get that creamy comfort without the carbs.
- Dairy-Free: Use plant-based milk and cheeses. Violife cheddar shreds melt nicely, and oat milk keeps things creamy.
- Spicy Kick: If you’re a heat-seeker, add an extra chopped Hatch chile or a pinch of cayenne pepper. I tried tossing in diced pickled jalapeños once—wow, it definitely woke things up!
I once made a version with smoked gouda in place of Gruyère, and it added a delightful smoky layer that paired perfectly with the roasted chiles. For different cooking methods, you can even make this on the stovetop and skip the baking—just stir in the pasta and serve right away for a super-saucy finish.
Allergen swaps? Use nut-based milk and gluten-free pasta. For nut allergies, stick to oat or soy milk. The beauty of this recipe is that you can truly make it your own.
Serving & Storage Suggestions
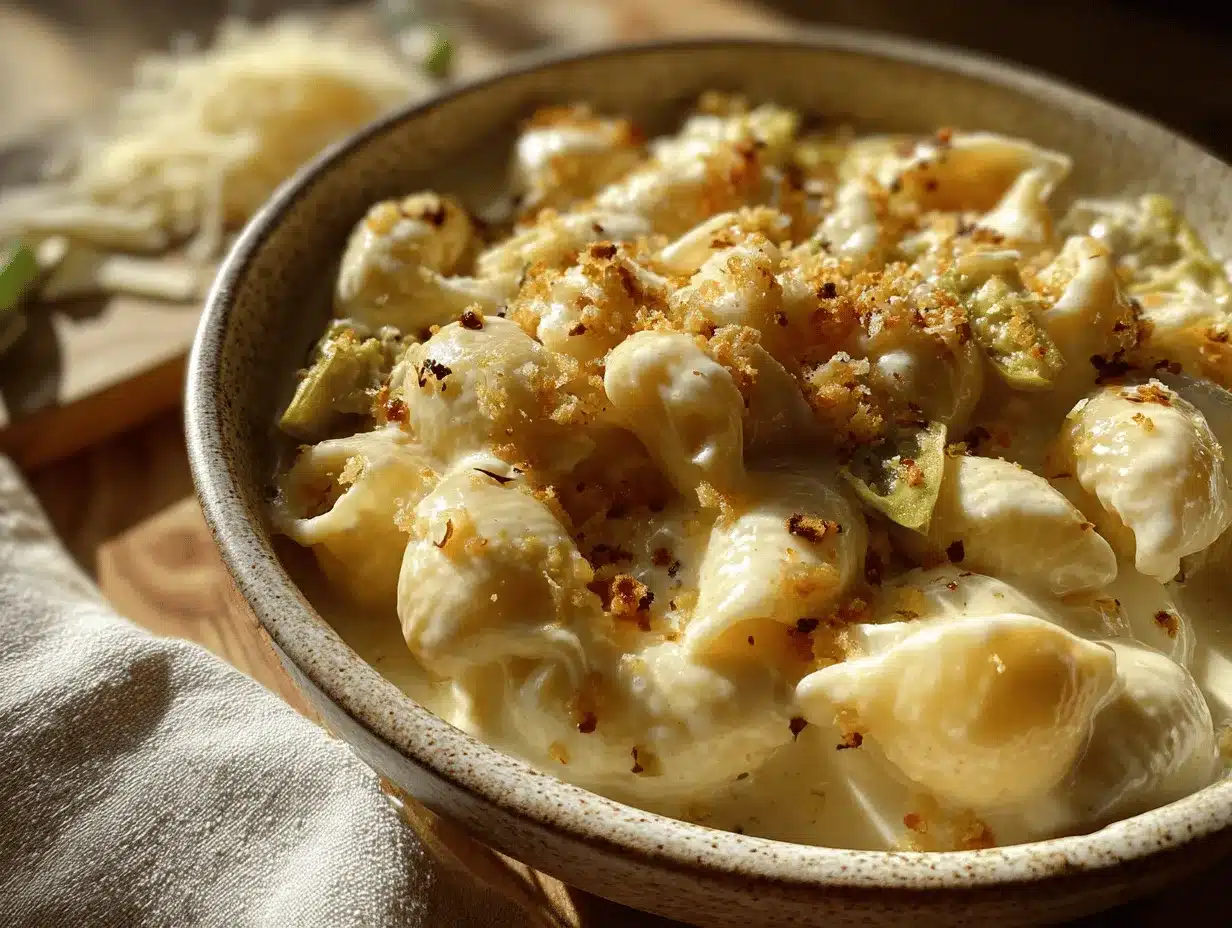
This savory creamy Hatch chile mac and cheese is best served hot from the oven, with the cheesy sauce bubbling and the breadcrumb topping perfectly crisp. For presentation, I love sprinkling fresh parsley and a few extra diced chiles on top—makes it pop for those Pinterest photos!
Serving Ideas: Pair with a crisp green salad, roasted autumn veggies, or even a bowl of spicy tomato soup. For a cozy dinner, serve alongside cider or a malty autumn beer. It’s a great side dish at potlucks, but honestly, it holds its own as a main course.
Storage: Refrigerate leftovers in an airtight container for up to 4 days. To freeze, wrap tightly and store for up to 2 months; thaw overnight in the fridge before reheating.
Reheating: Warm in a 350°F (175°C) oven, covered, until hot—about 20 minutes. Or, microwave individual servings with a splash of milk to keep things creamy. The flavors deepen with time, so leftovers taste even better the next day (I’ve been known to sneak a cold spoonful straight from the fridge—no shame).
Nutritional Information & Benefits
Each serving (about 1 1/2 cups) of savory creamy Hatch chile mac and cheese contains roughly:
| Nutrient | Amount (approx.) |
|---|---|
| Calories | 420 |
| Protein | 18g |
| Carbohydrates | 38g |
| Fat | 22g |
| Fiber | 3g |
| Sodium | 550mg |
Hatch chiles pack vitamin C and antioxidants, while whole milk and cheese add protein and calcium. If you use whole grain or legume pasta, you’ll get a fiber boost too. For gluten-free or dairy-free diets, just swap accordingly—the cheese sauce adapts well. Watch out for dairy and gluten if you’re allergic; nut-based milks are a safe bet for most.
Personally, I love that this mac and cheese satisfies both comfort food cravings and adds a kick of veggies. It’s the kind of meal that feels indulgent but still packs some nutrition, especially with the chiles. Eating well in autumn is all about warmth, flavor, and balance—and this recipe totally fits.
Conclusion
There’s nothing quite like a bowl of savory creamy Hatch chile mac and cheese to wrap up a chilly autumn day. It’s cheesy, smoky, and just spicy enough to keep things interesting. I love how easy it is to customize, so everyone at the table gets a taste of comfort tailored to their cravings.
If you’re searching for a recipe that’s both familiar and exciting, this Hatch chile mac and cheese is your answer. Whether you try it as written or swap in your own favorite ingredients, you’re guaranteed a dish that brings smiles (and seconds!).
Honestly, this recipe is one of my absolute autumn favorites—maybe because every forkful feels like a celebration of the season. I’d love for you to give it a try, share your tweaks, and let me know how it turned out! Drop a comment below, pin it for later, or send me your own variations. Cozy nights deserve great food—make this one yours.
Frequently Asked Questions
Can I make Hatch chile mac and cheese without baking?
Yes! After combining the pasta and cheese sauce, serve immediately for a super-creamy stovetop version. The baking step is just for the crunchy topping.
Where can I find Hatch chiles if they’re out of season?
Check the canned goods aisle for roasted Hatch chiles. They work well and still add great flavor. Some specialty stores sell frozen Hatch chiles year-round.
Can I use other types of cheese?
Absolutely. Feel free to swap Gruyère for fontina, Monterey Jack for mozzarella, or add smoked gouda for a twist. Just stick with good melting cheeses for the sauce.
How spicy is this recipe?
With mild Hatch chiles, the heat is gentle. If you use “hot” chiles or add extra, it gets spicier. Always taste and adjust based on your preference!
Is this recipe freezer-friendly?
Yes, you can freeze it after baking. Let it cool, wrap tightly, and freeze for up to 2 months. Thaw in the fridge before reheating in the oven for best texture.
Pin This Recipe!


Savory Hatch Chile Mac and Cheese
- Total Time: 45 minutes
- Yield: 6 servings 1x
Description
This creamy mac and cheese features smoky roasted Hatch chiles, a blend of sharp cheddar, Gruyère, and Monterey Jack cheeses, and a crispy panko topping. It’s the ultimate cozy comfort food for autumn nights, delivering bold flavor and gentle heat in every bite.
Ingredients
- 12 ounces elbow macaroni (or any short pasta like cavatappi or shells)
- Salt, for boiling water
- 2 tablespoons unsalted butter
- 2 tablespoons all-purpose flour
- 2 cups whole milk (or half-and-half)
- 1/2 cup heavy cream (optional)
- 2–3 roasted Hatch chiles, chopped (about 4 ounces; mild or hot)
- 1/2 teaspoon garlic powder (or 1 clove fresh garlic, finely minced)
- 1/2 teaspoon smoked paprika
- 1/4 teaspoon black pepper
- 1/4 teaspoon kosher salt (plus more to taste)
- 2 cups sharp cheddar cheese, shredded
- 1 cup Gruyère cheese, shredded
- 1/2 cup Monterey Jack cheese, shredded
- 1/2 cup panko breadcrumbs (optional topping)
- 1 tablespoon unsalted butter, melted (for topping)
- 1 tablespoon chopped fresh parsley (for topping)
Instructions
- Bring a large pot of salted water to a boil. Add elbow macaroni and cook until al dente, about 7-8 minutes. Drain and set aside.
- If using fresh Hatch chiles, preheat oven to 450°F. Roast whole chiles on a baking sheet for 10 minutes, turning halfway, until skins blister. Transfer to a bowl, cover, and steam for 5 minutes. Peel, remove seeds, and chop.
- In a medium saucepan over medium heat, melt 2 tablespoons butter. Whisk in flour and cook for 1 minute until bubbling.
- Slowly pour in milk, whisking constantly to avoid lumps. Add heavy cream if using.
- Add chopped Hatch chiles, garlic powder, smoked paprika, black pepper, and salt. Simmer for 2-3 minutes.
- Reduce heat to low. Gradually stir in cheddar, Gruyère, and Monterey Jack cheeses until melted and sauce is creamy.
- Add drained pasta to the sauce and fold gently until evenly coated. Taste and adjust seasoning.
- For the optional topping, mix panko breadcrumbs with melted butter and sprinkle over mac and cheese in a baking dish. Top with parsley.
- If baking, preheat oven to 375°F. Bake for 18-20 minutes until bubbly and golden. Broil for 2-3 minutes for a crispier top. Let cool for 5 minutes before serving.
Notes
For gluten-free, use GF pasta and flour. For dairy-free, substitute plant-based milk and cheese. Freshly grated cheese melts best. Adjust Hatch chile quantity for desired heat. The recipe can be served stovetop for extra creaminess or baked for a crispy topping. Leftovers keep well and taste even better the next day.
- Prep Time: 15 minutes
- Cook Time: 30 minutes
- Category: Main Course
- Cuisine: American, Southwestern
Nutrition
- Serving Size: About 1 1/2 cups per serving
- Calories: 420
- Sugar: 6
- Sodium: 550
- Fat: 22
- Saturated Fat: 13
- Carbohydrates: 38
- Fiber: 3
- Protein: 18
Keywords: mac and cheese, Hatch chile, autumn comfort food, creamy pasta, baked mac and cheese, southwestern recipe, easy dinner, vegetarian option