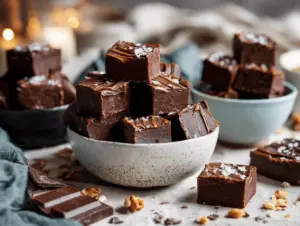
The moment you cut into a perfectly set batch of decadent fudge, it’s like stepping into a world where chocolate rules and every bite feels like a tiny celebration. Honestly, if you’ve ever craved something intensely chocolatey, smooth, and just a little bit over-the-top, you know exactly what I mean! My journey with this decadent fudge recipe started when I was hunting for the ideal party treat—something easy but impressive, rich but not overwhelming, and (most importantly) a dessert that leaves guests asking for the recipe.
It’s funny, because fudge has always seemed a bit mysterious to me. Growing up, I thought it was reserved for fancy candy shops or grandma’s secret stash. But after experimenting with different chocolate combos and methods, I cracked the code for homemade fudge that’s simple, luxurious, and absolutely party-ready. Whether you’re prepping for a holiday bash, a birthday, or just a cozy night in, this fudge delivers big on flavor and wow-factor. Plus, you get the bonus of filling your kitchen with that unmistakable, comforting aroma of melted chocolate—seriously, who needs scented candles?
Decadent fudge has become my go-to for gifting, potlucks, and, let’s face it, late-night chocolate emergencies. It’s the kind of treat that feels fancy but doesn’t ask for culinary gymnastics. As someone who’s tested more fudge recipes than I care to admit, I can promise you this one has the right balance of creamy texture, rich chocolate, and just enough sweetness. Whether you’re a first-time fudge-maker or a seasoned chocolate lover, you’ll find this recipe approachable and totally irresistible. Let’s get into what makes this decadent fudge recipe the best homemade chocolate treat for parties!
Why You’ll Love This Decadent Fudge Recipe
After countless batches and a few chocolate mishaps, I can honestly say this fudge is a game-changer—for parties, gifts, or just a personal treat. Here’s why you’ll fall in love with it (and maybe hoard a few extra pieces for yourself):
- Quick & Easy: Ready in under 20 minutes (plus chilling time), so you can whip it up even if you’re scrambling before guests arrive.
- Simple Ingredients: No need for candy thermometers or obscure chocolate brands. Everything is probably already in your pantry.
- Perfect for Parties: This decadent fudge is a guaranteed hit for birthdays, holidays, or any gathering where you want to impress.
- Crowd-Pleaser: Kids love it. Adults swoon. I’ve yet to meet someone who doesn’t ask for seconds.
- Unbelievably Delicious: Creamy, melt-in-your-mouth texture with a deep chocolaty flavor that lingers (in the best way).
What really sets this decadent fudge recipe apart is how the chocolate and butter meld together for a silky finish. I always blend the mixture just a bit longer than most recipes suggest, and wow—does that make a difference. You also get the flexibility to toss in nuts, swirls, or anything that suits your mood. It’s a fudge that feels both classic and customizable.
This isn’t just another fudge recipe—it’s the one my family now requests at every party. There’s something about that first bite: rich, creamy, and just sweet enough. It’s comfort food, but with a little sparkle. Whether for gifting, sharing, or treating yourself, you’ll be glad you made (and shared) this decadent fudge. I know I always am!
Ingredients Needed for Decadent Fudge
This fudge recipe keeps things blissfully simple but doesn’t skimp on flavor. You’ll find most of these ingredients are probably already hanging out in your pantry or fridge, waiting for their moment in the spotlight. Here’s what you’ll need:
- For the fudge base:
- 2 cups (340g) semi-sweet chocolate chips (I like Ghirardelli for rich flavor)
- 1 cup (170g) milk chocolate chips (adds creaminess)
- 1 (14-ounce/396g) can sweetened condensed milk (don’t swap for evaporated milk—trust me, I tried and regretted it!)
- 4 tablespoons (56g) unsalted butter, cut into pieces (softened for easier melting)
- 1 teaspoon pure vanilla extract (real vanilla makes a real difference)
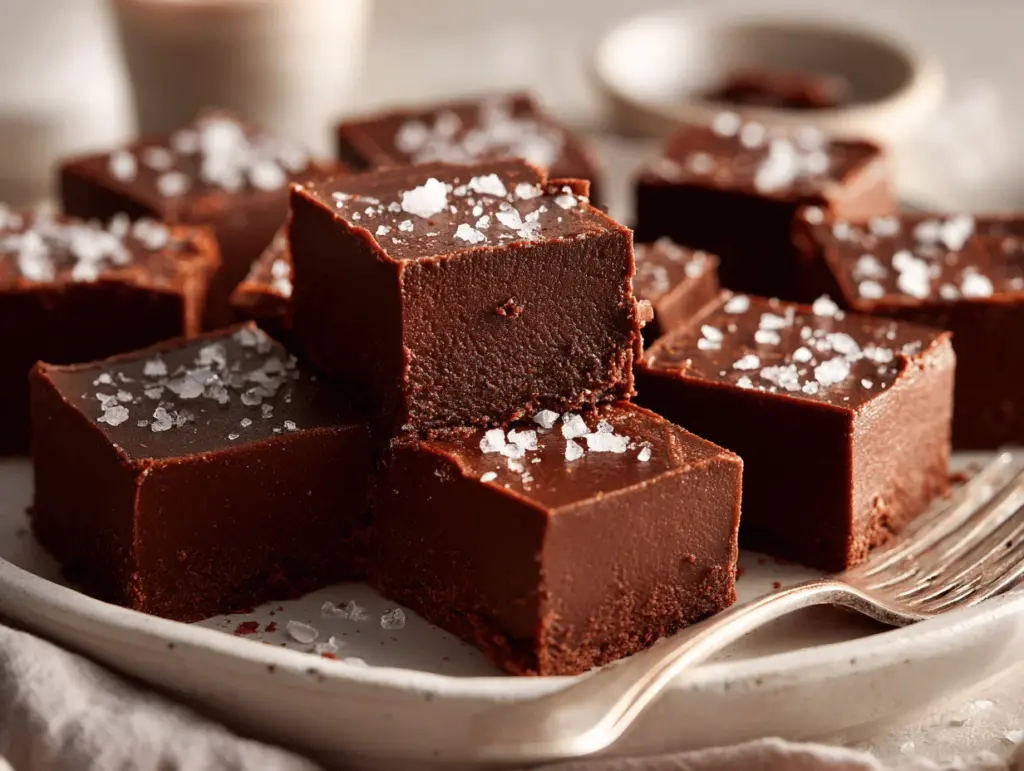
- Pinch of sea salt (balances the sweetness—don’t skip)
- Optional mix-ins:
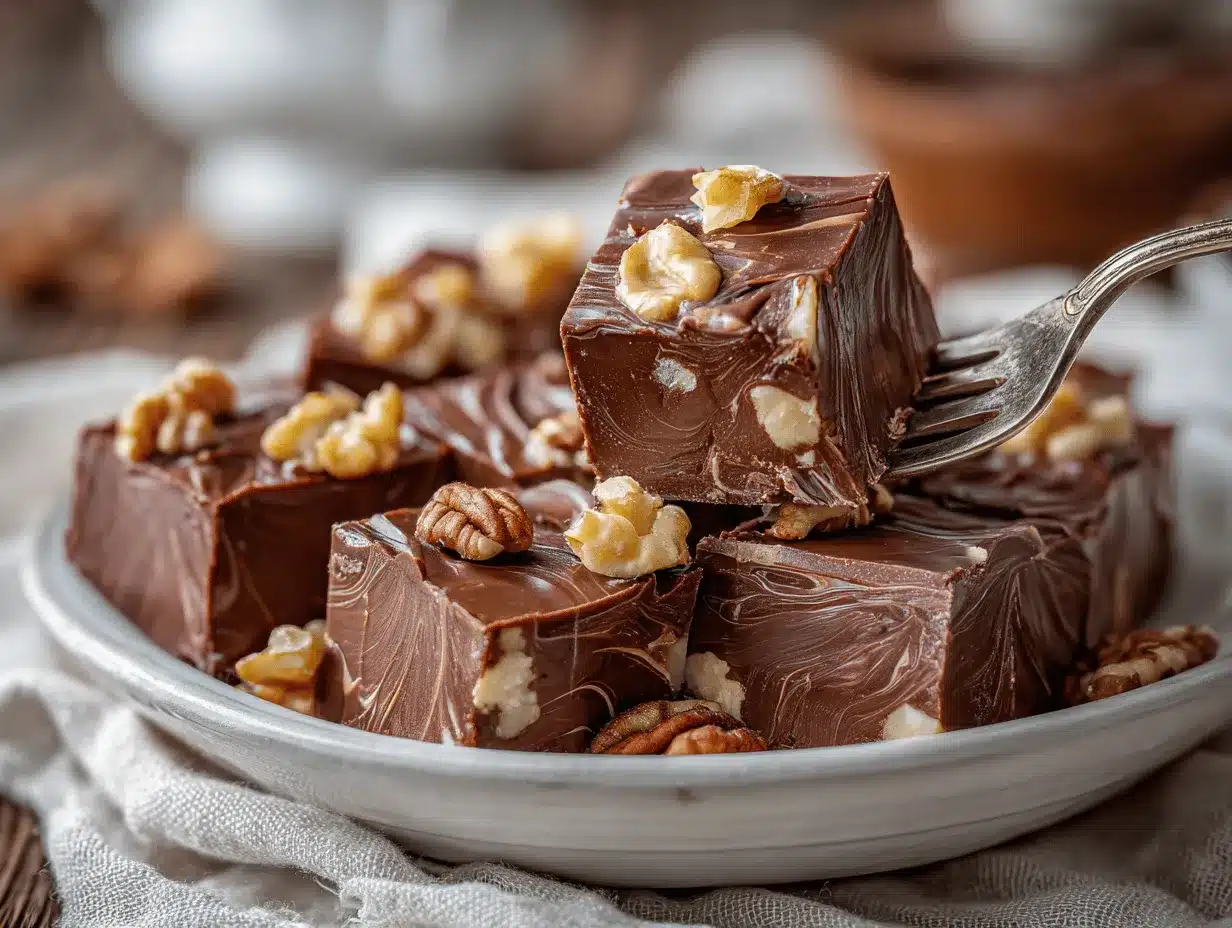
- 1/2 cup (60g) chopped toasted walnuts or pecans (for crunch)
- 1/3 cup (50g) mini marshmallows (for a rocky road vibe)
- 1/4 cup (30g) dried cherries or cranberries (for a sweet-tart twist)
- Sprinkles, crushed candy canes, or a drizzle of white chocolate (for festive flair)
Ingredient selection can make or break your fudge. I’ve found that using a mix of semi-sweet and milk chocolate chips gives the perfect balance—too much dark chocolate can be overpowering, while just milk chocolate might be too mild. If you’re looking for dairy-free or vegan options, swap the butter for coconut oil and use vegan chocolate chips. For a gluten-free treat, double-check that your chocolate chips and mix-ins are safe (most are, but always read labels!).
Pro tip: If you’re shopping for sweetened condensed milk, I recommend Eagle Brand for consistency. For nuts, a quick toast in a dry skillet brings out their flavor—worth the extra minute, I promise. Whatever your preferences, this fudge base is flexible enough to welcome your favorite flavors and textures. That’s part of the fun!
Equipment Needed
One of the best things about this decadent fudge recipe is how little equipment you actually need. Here’s what I reach for every time:
- Medium saucepan (nonstick if possible—it makes cleanup easier)
- Wooden spoon or heatproof spatula (for stirring and scraping)
- 8×8-inch (20x20cm) square baking pan (lined with parchment for easy removal)
- Mixing bowl (if adding mix-ins)
- Sharp knife (for slicing once set)
- Measuring cups and spoons (accuracy matters for fudge texture!)
- Optional: Offset spatula (helps smooth the top if you want that Instagram-worthy finish)
If you don’t have a square pan, a loaf pan works—your pieces will just be thicker. I’ve used silicone pans before and honestly, they make the fudge pop right out. For stirring, a basic wooden spoon has never let me down, but a silicone spatula is handy for scraping every last bit of chocolatey goodness. Budget tip: Dollar-store pans and utensils work fine; just line with parchment. For specialty equipment like offset spatulas, a butter knife does the job in a pinch. Keep it simple—fudge is forgiving!
Preparation Method
- Prep your pan: Line an 8×8-inch (20x20cm) baking pan with parchment paper, leaving an overhang on two sides for easy lifting later. Lightly grease the parchment if you want extra insurance against sticking.
- Melt the ingredients: In a medium saucepan over low heat, combine 2 cups (340g) semi-sweet chocolate chips, 1 cup (170g) milk chocolate chips, 1 (14-ounce/396g) can sweetened condensed milk, and 4 tablespoons (56g) unsalted butter. Stir constantly with a wooden spoon or spatula until everything is melted and smooth—about 5-7 minutes. Watch closely; chocolate can scorch fast if the heat’s too high.
- Add vanilla and salt: Remove the pan from heat. Stir in 1 teaspoon vanilla extract and a pinch of sea salt. The mixture should look glossy and thick. If adding nuts, marshmallows, or dried fruit, fold them in now using a spatula in a gentle motion.
- Pour and smooth: Scrape the fudge mixture into your prepared pan. Use an offset spatula or the back of your spoon to smooth the top. If you’re feeling fancy, sprinkle extra mix-ins or drizzle a bit of melted white chocolate on top for decoration.
- Chill: Refrigerate the pan uncovered for at least 3 hours, or until the fudge is set and firm. Don’t rush this step—if the fudge is too soft, slicing will be messy (been there, done that).
- Slice and serve: Lift the fudge out using the parchment overhang. Place on a cutting board and use a sharp knife to slice into 1-inch (2.5cm) squares. For super clean edges, wipe the knife between cuts.
- Troubleshooting tips: If your fudge looks oily, it’s likely the butter separated—make sure to melt everything over low heat and stir gently. If the fudge is too soft, pop it back in the fridge for another hour. And if it’s too firm, let it sit at room temp for 10-15 minutes before slicing.
Personal tip: I always make fudge the night before a party to give it plenty of time to set. Sometimes, I double the batch and use two pans—one classic, one loaded with mix-ins. It’s a fun way to offer variety without extra work. Fudge-making is surprisingly forgiving, but attention to detail (like mixing thoroughly and not overheating) really pays off.
Cooking Tips & Techniques
There are a few tricks I’ve learned after making (and occasionally botching) fudge over the years:
- Low and slow heat is key: Don’t rush the melting step. High heat can scorch chocolate and make the texture gritty.
- Constant stirring: Chocolate chips and condensed milk can stick to the bottom if left unattended, and that burnt taste is impossible to hide.
- Don’t overmix after adding mix-ins: Just a quick fold is plenty. Overworking can make nuts and marshmallows break down or make the fudge dense.
- Clean cuts: Use a hot, dry knife to slice—the heat helps glide through for smooth edges (pro tip: run the knife under hot water, then wipe dry before each cut).
- Room temperature ingredients: Butter and condensed milk blend more smoothly if not ice-cold. I let mine sit out for about 15 minutes before starting.
- Troubleshooting: If the fudge is grainy, the chocolate was overheated. If it doesn’t set, it likely needs more chilling time.
I’ve made the mistake of walking away “just for a minute” while melting, only to come back to a scorched pan. Learn from me and stay close! Timing matters—once everything is melted, move quickly to pour and chill. Multitasking tip: Prep your pan and mix-ins before you start melting, so you can move fast when the mixture’s ready. Consistency is all about gentle heat, steady stirring, and respecting the chill time. It’s simple, but a little extra care takes fudge from good to unforgettable.
Variations & Adaptations
One of the joys of fudge is how easy it is to customize! Here are a few fun ways I’ve tweaked this decadent fudge recipe for different occasions and preferences:
- Dietary: For vegan fudge, use dairy-free chocolate chips and coconut milk condensed milk. Swap butter for coconut oil (same ratio).
- Seasonal: In winter, I add crushed candy canes or peppermint extract for a festive touch. Summer calls for dried berries or chopped dried mango.
- Flavor twists: Stir in 1 tablespoon instant coffee or espresso powder for mocha fudge. Or add a swirl of peanut butter for a sweet-savory edge.
- Cooking method: Microwave method works too—combine all base ingredients in a microwave-safe bowl, heat in 30-second intervals (stirring often) until melted, then proceed as usual.
- Allergens: For nut-free fudge, leave out nuts and sub with seeds or crispy rice cereal for crunch.
My personal favorite adaptation is a double-layer fudge: I pour half the chocolate mixture into the pan, then swirl in a layer of melted peanut butter and top with the rest. It’s messy, but absolutely worth it! Feel free to experiment—let your taste buds lead the way. This recipe is endlessly adaptable, so don’t be shy about trying new mix-ins or flavor combos.
Serving & Storage Suggestions
Decadent fudge shines when served slightly chilled—firm but not rock-hard. I like to present it on a pretty platter or rustic wooden board, stacked in neat squares or triangles. For parties, arrange pieces in cupcake liners for easy grabbing (and less sticky fingers!).
This fudge pairs beautifully with fresh berries, a scoop of vanilla ice cream, or a glass of cold milk. For adults, a little espresso or red wine makes for a sophisticated dessert moment. If you’re packing fudge for gifts, wrap pieces in wax paper or place in a decorative tin.
To store, keep fudge in an airtight container in the refrigerator for up to 2 weeks. For longer storage, freeze tightly wrapped pieces for up to 3 months—just thaw overnight in the fridge before serving. When reheating (if you must!), use 5-second bursts in the microwave. Honestly, the flavor deepens a little after a day or two, making leftovers even more irresistible.
Nutritional Information & Benefits
This decadent fudge recipe yields about 36 pieces. Per piece (approximate): 95 calories, 5g fat, 12g carbs, 1g protein.
Key ingredients like dark chocolate bring antioxidants and a little mood boost (chocolate really does make you happier!). Nuts add healthy fats and crunch, while sweetened condensed milk keeps things creamy and satisfying. For those watching sugar, try using sugar-free chocolate chips and condensed milk alternatives.
This fudge is gluten-free by nature—just check your mix-ins to be sure. Allergens include dairy and possible nuts, depending on your additions. As a chocolate lover who tries to balance indulgence with wellness, I always keep the portions bite-sized and savor each piece. A treat like this is meant to be enjoyed—no guilt, just chocolate bliss!
Conclusion
If you’re searching for a homemade dessert that’s both luxurious and fuss-free, this decadent fudge recipe hits all the marks. It’s rich, creamy, and customizable—perfect for parties, gifts, or just treating yourself. I love how easy it is to whip up, and I’m always amazed at the rave reviews it gets every single time.
Don’t be afraid to put your own spin on it—add your favorite mix-ins, play with flavors, or keep it classic. Homemade fudge is one of those recipes that invites creativity and rewards you with pure chocolate joy. I’m always happy to share it, but I’ll admit, I stash a few pieces for those late-night cravings!
Give this recipe a try, and let me know in the comments how you customized your batch. Share it with friends, pin it for later, or send me your favorite fudge memories. Chocolate lovers unite—this is the treat we’ve all been waiting for!
Frequently Asked Questions
Can I make decadent fudge without a candy thermometer?
Absolutely! This recipe doesn’t require any candy thermometer—just gentle heat and stirring. That’s what makes it so approachable for beginners.
How do I prevent my fudge from becoming grainy?
Keep your heat low and stir constantly. If the chocolate overheats, it can seize and become grainy. Melting slowly is the best way to keep it creamy.
Can I freeze decadent fudge for later?
Yes! Wrap pieces tightly in plastic wrap and store in an airtight container. Fudge freezes beautifully for up to 3 months. Thaw overnight in the fridge before serving.
What mix-ins work best for this fudge recipe?
Nuts, dried fruit, marshmallows, and crushed candy all work well. Just make sure everything is chopped small for even distribution.
Is this fudge gluten-free?
Yes, the base recipe is gluten-free. Just double-check your chocolate chips and mix-ins to be sure they don’t contain any hidden gluten.
Pin This Recipe!

Decadent Fudge Recipe: Best Homemade Chocolate Treat for Parties
- Total Time: 3 hours 17 minutes
- Yield: 36 pieces 1x
Description
This decadent fudge recipe is rich, creamy, and easy to make—perfect for parties, gifting, or satisfying late-night chocolate cravings. With simple ingredients and customizable mix-ins, it’s a crowd-pleasing treat that delivers big on flavor and wow-factor.
Ingredients
- 2 cups (340g) semi-sweet chocolate chips
- 1 cup (170g) milk chocolate chips
- 1 (14-ounce/396g) can sweetened condensed milk
- 4 tablespoons (56g) unsalted butter, cut into pieces and softened
- 1 teaspoon pure vanilla extract
- Pinch of sea salt
- Optional: 1/2 cup (60g) chopped toasted walnuts or pecans
- Optional: 1/3 cup (50g) mini marshmallows
- Optional: 1/4 cup (30g) dried cherries or cranberries
- Optional: Sprinkles, crushed candy canes, or a drizzle of white chocolate
Instructions
- Line an 8×8-inch baking pan with parchment paper, leaving an overhang on two sides for easy lifting. Lightly grease the parchment if desired.
- In a medium saucepan over low heat, combine semi-sweet chocolate chips, milk chocolate chips, sweetened condensed milk, and unsalted butter. Stir constantly until melted and smooth, about 5-7 minutes.
- Remove from heat. Stir in vanilla extract and a pinch of sea salt. Fold in any desired mix-ins (nuts, marshmallows, dried fruit) gently.
- Scrape the fudge mixture into the prepared pan. Smooth the top with an offset spatula or spoon. Add extra mix-ins or drizzle melted white chocolate on top if desired.
- Refrigerate uncovered for at least 3 hours, or until set and firm.
- Lift fudge out using the parchment overhang. Place on a cutting board and slice into 1-inch squares with a sharp knife, wiping the knife between cuts for clean edges.
- If fudge is too soft, chill longer. If too firm, let sit at room temperature for 10-15 minutes before slicing.
Notes
Use a mix of semi-sweet and milk chocolate chips for balanced flavor. Toast nuts for extra crunch. For vegan or dairy-free fudge, substitute coconut oil for butter and use vegan chocolate chips and coconut condensed milk. Fudge is best served slightly chilled and can be stored in the fridge for up to 2 weeks or frozen for up to 3 months. For clean cuts, use a hot, dry knife.
- Prep Time: 10 minutes
- Cook Time: 7 minutes
- Category: Dessert
- Cuisine: American
Nutrition
- Serving Size: 1 piece (about 1-inch square)
- Calories: 95
- Sugar: 10
- Sodium: 25
- Fat: 5
- Saturated Fat: 3
- Carbohydrates: 12
- Fiber: 1
- Protein: 1
Keywords: fudge, chocolate, party dessert, homemade fudge, easy fudge, gluten-free dessert, holiday treat, gifting, creamy fudge, decadent chocolate