Introduction
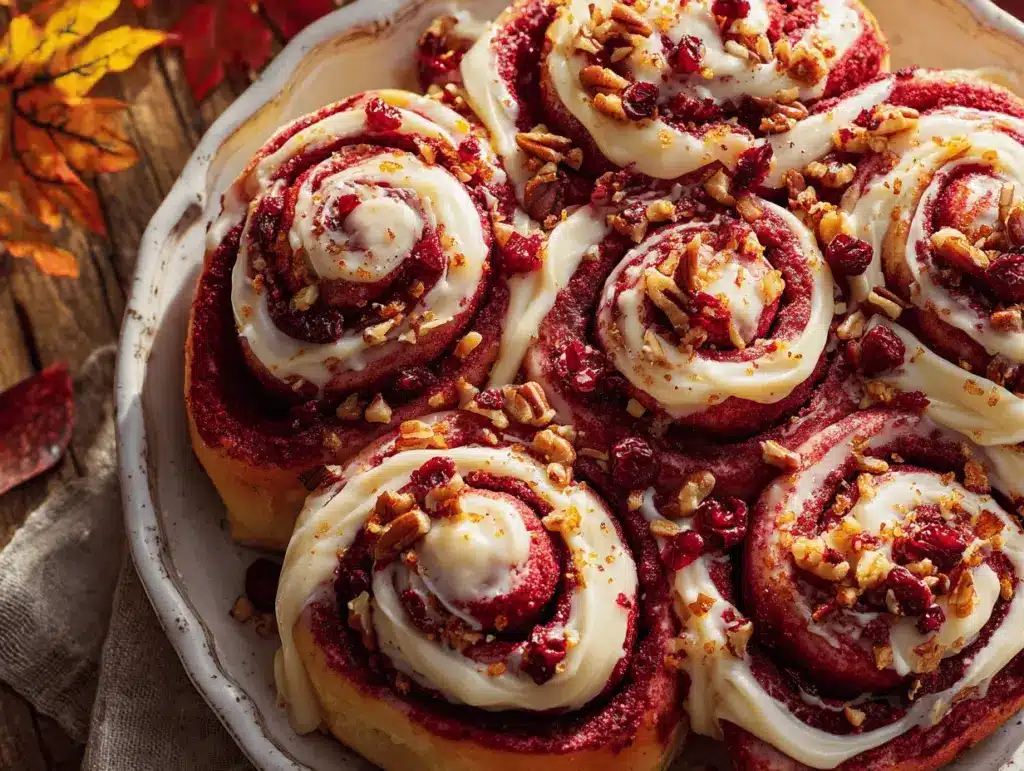
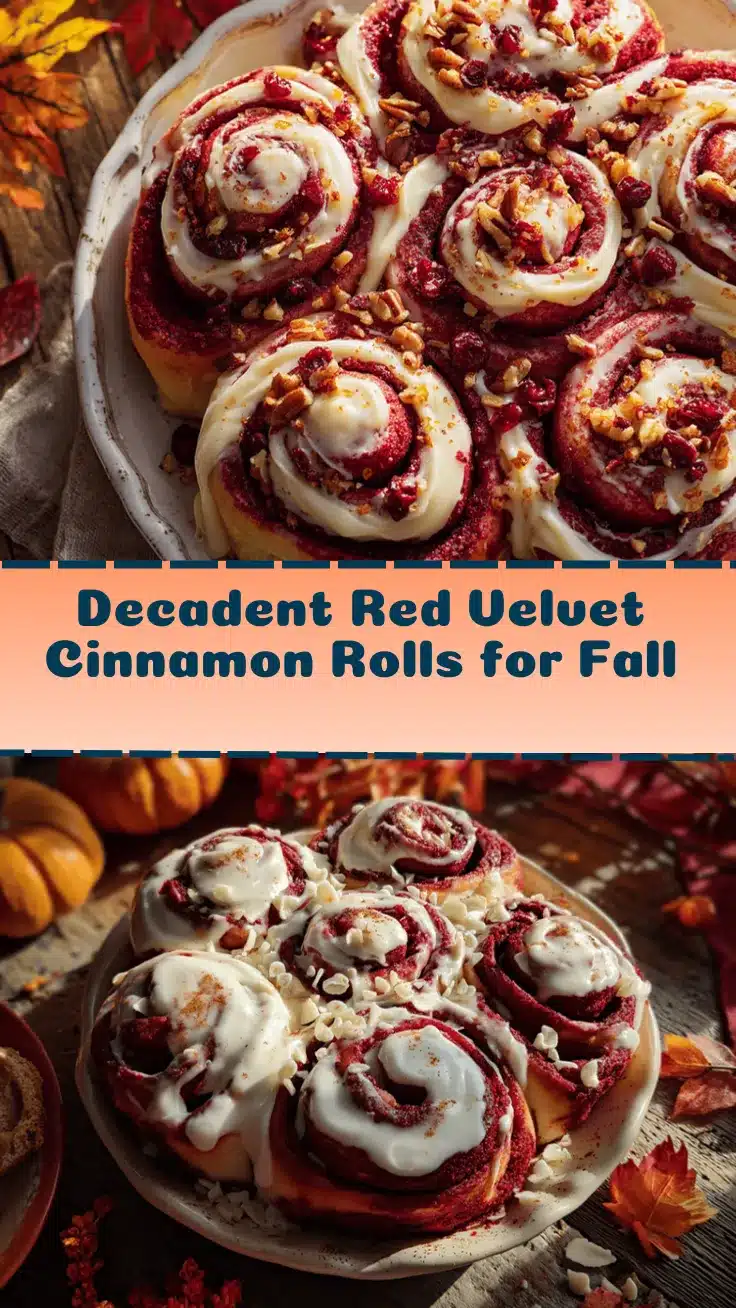
The first time I pulled a batch of these red velvet cinnamon rolls from my oven, the smell was like a bakery hug—warm cocoa mingled with spicy cinnamon, all wrapped up in buttery richness. I’ll confess, it was a chilly October morning, and I was craving something that felt special but didn’t require a pastry chef’s patience. Red velvet always reminds me of celebration, but when you swirl it up with gooey cinnamon filling and creamy glaze, it’s honestly next-level cozy.
I stumbled onto the idea for red velvet cinnamon rolls during a fall brunch potluck. I was tired of making the same old coffee cake, and thought, “Why not mash up my favorite cake with those classic rolls?” Turns out, it’s a match made for crisp mornings and big mugs of coffee. These rolls are soft, fluffy, and have that beautiful red color that just screams autumn vibes. The best part? The recipe is surprisingly easy, even if you’re new to baking yeast doughs.
Whether you’re hosting friends or just want to treat yourself (you know you deserve it), these red velvet cinnamon rolls are packed with flavor and nostalgia. I’ve tested this recipe over a dozen times, tweaking the cocoa balance, playing with different fillings, and—trust me—they always disappear fast. If you love the idea of a fall brunch that feels a bit fancy but is totally doable, grab your apron and let’s bake some magic. Red velvet cinnamon rolls are about to become your new seasonal favorite!
Why You’ll Love This Recipe
- Quick & Easy: These red velvet cinnamon rolls come together in under two hours, making them perfect for last-minute brunches or cozy weekend mornings.
- Simple Ingredients: No weird specialty items here—everything is probably in your pantry or fridge right now.
- Perfect for Fall Brunch: The warm cinnamon and subtle chocolate flavors make these rolls ideal for autumn gatherings, holiday mornings, or just a lazy Saturday.
- Crowd-Pleaser: Kids, adults, even picky eaters—everyone loves these! The vibrant color and sweet aroma win them over every time.
- Unbelievably Delicious: Soft, fluffy dough with a velvety crumb, gooey cinnamon filling, and cream cheese glaze—every bite is comfort food heaven.
What sets these apart? I use a bit more cocoa than standard red velvet, and whip the dough until it’s silky. You don’t have to be a baking whiz—just follow the steps and you’ll get bakery-worthy results at home. The rolls stay tender for days, and the color is gorgeous on a brunch table (so Pinterest-worthy, right?).
Honestly, these red velvet cinnamon rolls are more than just breakfast—they’re the kind of treat that makes people gather around the kitchen, sneak seconds, and ask for the recipe. They bring a little bit of celebration to any morning, but without tons of work or mess. If you want something that feels extra special but is totally doable, this recipe is here for you!
Ingredients Needed
This recipe uses simple, wholesome ingredients to deliver bold flavor and that signature red velvet hue. Most of these are pantry staples, but I’ll share my favorite brands and a few easy swaps, just in case.
- For the Dough:
- 2 1/4 cups (280g) all-purpose flour (plus extra for dusting)
- 1 packet (2 1/4 tsp, 7g) instant yeast
- 1/2 cup (120ml) warm milk (whole or 2%, about 110°F/43°C)
- 1/4 cup (50g) granulated sugar
- 1/4 cup (58g) unsalted butter, melted
- 1 large egg, room temperature
- 2 tbsp (14g) unsweetened cocoa powder (I love Ghirardelli for extra richness)
- 1/2 tsp salt
- 1 tsp vanilla extract
- 2-3 tsp red food coloring (gel works best for vibrant color)
- For the Cinnamon Filling:
- 1/3 cup (76g) unsalted butter, softened
- 2/3 cup (135g) brown sugar, packed
- 1 1/2 tbsp (12g) ground cinnamon
- 1 tbsp (8g) unsweetened cocoa powder (optional, for extra chocolate flavor)
- For the Cream Cheese Glaze:
- 3 oz (85g) cream cheese, softened
- 1/4 cup (58g) unsalted butter, softened
- 1 cup (120g) powdered sugar, sifted
- 1/2 tsp vanilla extract
- 1-2 tbsp (15-30ml) milk (adjust for desired consistency)
- Pinch of salt
Substitution Tips:
- Swap almond or oat milk for dairy if needed, but whole milk gives the best texture.
- Use gluten-free all-purpose blend if you want, but rolls may be slightly denser.
- Coconut oil works in place of butter for a dairy-free version (though flavor changes).
- No food coloring? The rolls will be more like cocoa cinnamon rolls, still delicious!
- Try vegan cream cheese if you want a plant-based glaze.
For the cocoa powder, trust me—quality matters! The flavor pops more with a good brand. If you’re in a pinch, regular store-brand works, but splurge when you can. In fall, sometimes I add a pinch of pumpkin pie spice to the filling for extra autumn vibes. This recipe is pretty forgiving, so don’t stress if you need to swap something out—just keep the basics intact and you’ll get amazing red velvet cinnamon rolls every time.
Equipment Needed
- Mixing bowls: At least two (one for dough, one for filling). Glass or stainless steel both work.
- Whisk and wooden spoon: For mixing wet and dry ingredients. If you have a stand mixer, use the dough hook for easy kneading.
- Rolling pin: Essential for rolling out the dough. If you don’t have one, a clean wine bottle works in a pinch (been there, done that!).
- Measuring cups and spoons: Accuracy matters, especially with flour and yeast.
- 8×8-inch (20x20cm) baking pan: Glass or metal is fine. I’ve used both with good results.
- Plastic wrap or clean kitchen towel: For covering the dough while it rises.
- Silicone spatula: Handy for spreading filling and scraping glaze.
- Sharp knife or bench scraper: For cutting the rolls cleanly.
- Optional: Parchment paper for easier cleanup.
If you’re on a budget, skip the fancy stand mixer—hand mixing works! Just be ready for a little arm workout. I always keep my rolling pin lightly floured to avoid sticking, and if you use a glass pan, lower the oven temp by about 5°F to prevent over-browning. Maintenance tip: wash tools right after use for easy cleanup (trust me, dried glaze is sticky stuff!).
Preparation Method
- Make the Dough:
In a large mixing bowl, whisk together the warm milk, yeast, and 1 tablespoon of sugar. Let sit for 5 minutes until bubbly. (If it doesn’t bubble, your yeast may be dead—start over with fresh yeast.) - Add the melted butter, remaining sugar, egg, cocoa powder, salt, vanilla, and red food coloring to the yeast mixture. Whisk until well combined.
- Gradually stir in the flour, 1 cup (125g) at a time. Once the dough pulls together, knead on a floured surface for about 5-7 minutes (or use a stand mixer with a dough hook for 4-5 minutes), until the dough is smooth, elastic, and slightly tacky but not sticky. If it’s too sticky, add flour 1 tablespoon at a time.
- Place the dough in a lightly greased bowl, cover with plastic wrap or a damp towel, and let rise in a warm spot for 45-60 minutes, until doubled in size. (If your kitchen is chilly, turn on the oven for a minute, then turn it off and let the dough rise inside.)
- Prepare the Filling:
While the dough rises, mix the softened butter, brown sugar, cinnamon, and cocoa powder in a bowl until combined and spreadable. Set aside. - Shape the Rolls:
Punch down the risen dough and turn it onto a floured surface. Roll out into a rectangle about 12×8 inches (30x20cm), about 1/4-inch (6mm) thick. Spread the cinnamon filling evenly over the dough, leaving a 1/2-inch (1cm) border on one long edge. - Starting on the opposite long edge, tightly roll up the dough into a log. Pinch the seam to seal. If the dough tears, gently patch it and keep rolling—it happens!
- Slice the log into 9 even pieces (about 1.25 inches/3cm thick each) using a sharp knife or bench scraper. Place rolls cut-side up in a greased 8×8-inch pan, spaced slightly apart.
- Cover the pan and let the rolls rise for 30 minutes. Preheat your oven to 350°F (175°C) during this time.
- Bake:
Bake the rolls for 22-26 minutes, until puffed and lightly golden. The tops should feel set, and the filling will bubble a bit. (If your oven has hot spots, rotate the pan halfway through.) - Make the Glaze:
While the rolls bake, beat together the cream cheese, butter, powdered sugar, vanilla, milk, and pinch of salt until smooth and pourable. Adjust milk for desired consistency. - Let the rolls cool for 10-15 minutes, then drizzle glaze over warm rolls. (If you glaze them too hot, it’ll melt into the rolls—still tasty, just a bit messier!)
If your dough isn’t rising well, double-check the milk temperature. Too hot kills yeast, too cold slows everything down. The dough should feel soft and springy. Don’t rush the rise—it’s worth it for pillowy red velvet cinnamon rolls!
Personal tip: I prep the filling while the dough rises so everything’s ready to go. If you want to make them ahead, refrigerate the shaped rolls overnight and bake fresh in the morning—so good!
Cooking Tips & Techniques
Here’s what I’ve learned (sometimes the hard way) while making these red velvet cinnamon rolls again and again.
- Yeast Troubles? If your dough doesn’t rise, your yeast might be old or the milk too hot/cold. Always test yeast before adding other ingredients—just 5 minutes with warm milk and sugar.
- Dough Consistency: The dough should be slightly sticky but not wet. Add flour slowly, and don’t overwork it—over-kneading makes rolls tough.
- Rolling Technique: Don’t stress if your rectangle isn’t perfect! Patch up tears and roll tightly for neat spirals.
- Even Slicing: Use dental floss (unflavored) for clean cuts—it’s weird but works way better than a knife.
- Rise Time: If you’re in a rush, let the dough rise in a warm oven (turned off). But don’t skip this step—the rolls need it to be fluffy.
- Glaze Application: Glaze while warm for gooier results, or wait for cooler rolls if you want a thicker topping.
- Personal Fail: Once I forgot to grease the pan—big mistake! Rolls stuck and tore. Always grease or line with parchment for easy removal.
Timing tip: Prep the filling and glaze while the dough rises, so you’re not scrambling. If multitasking isn’t your thing, just take it step-by-step. Consistency comes from patience—let the yeast and dough do their thing, and you’ll get those perfect red velvet cinnamon rolls every time.
Variations & Adaptations
I love tweaking this recipe to fit different diets and seasons—here’s how you can make these red velvet cinnamon rolls your own.
- Gluten-Free: Use a gluten-free all-purpose flour blend. The rolls will be a bit more dense, but still delicious. Make sure your blend contains xanthan gum for best results.
- Vegan: Swap dairy milk for almond milk, butter for vegan margarine or coconut oil, and use vegan cream cheese for the glaze. Substitute the egg with 1/4 cup unsweetened applesauce or a flax egg (1 tbsp ground flaxseed + 2.5 tbsp water).
- Seasonal Twist: Add 1/4 cup chopped toasted pecans or walnuts to the filling for crunch. In winter, a pinch of ground ginger and nutmeg gives a deeper spice profile.
- Flavor Changes: For chocolate lovers, top with mini chocolate chips before rolling. For citrus fans, add orange zest to the glaze.
- Cooking Method: You can make these in a muffin tin for individual mini rolls, or double the recipe for a big 9×13-inch pan if you’re feeding a crowd.
- Personal Variation: I’ve swapped the cinnamon filling for a pumpkin spice blend in October—so good and extra autumnal!
Allergen note: Always check your food coloring and baking powder for gluten or animal products if you have dietary restrictions. There’s plenty of room to experiment with these red velvet cinnamon rolls—so don’t be afraid to make them your own!
Serving & Storage Suggestions
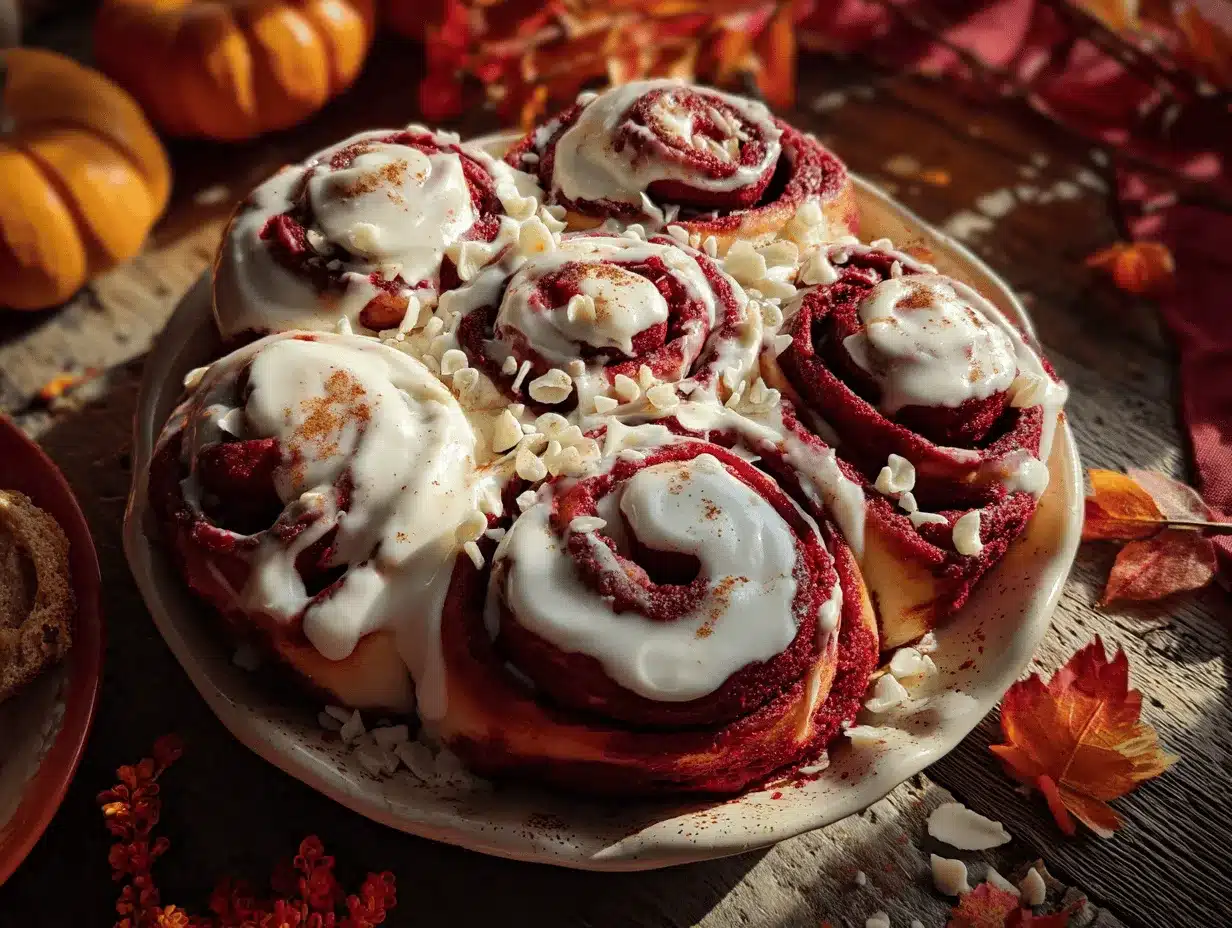
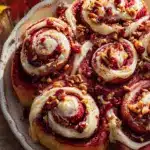
These red velvet cinnamon rolls are absolute showstoppers served warm, straight from the oven. The glaze melts into the spirals for maximum gooeyness. I like to present them in the baking dish, then drizzle extra glaze and sprinkle with a dusting of cocoa or cinnamon for a bakery-style look.
- Serving Temperature: Best enjoyed warm, but they’re still fantastic at room temp.
- Presentation: Garnish with fresh berries or mint for brunch, or add a sprinkle of chopped nuts for an autumnal touch.
- Beverage Pairings: Coffee, chai, or even a pumpkin spice latte go perfectly. For kids, try hot cocoa!
- Storage: Keep leftovers tightly covered at room temperature for up to 2 days, or refrigerate for up to 5 days. They tend to get a bit firmer after refrigeration, but a quick microwave zap (10-15 seconds) brings back the softness.
- Freezing: Freeze unglazed rolls for up to 2 months. Thaw overnight in the fridge, then warm and glaze.
- Flavor Development: The cinnamon and cocoa flavors deepen overnight, so day-two rolls might taste even richer.
Tip: If you’re making these for a brunch party, bake them fresh in the morning, then glaze and serve right before guests arrive—the smell alone will have everyone hungry!
Nutritional Information & Benefits
Here’s an estimate per roll (glazed):
- Calories: ~320
- Fat: 13g
- Carbs: 45g
- Protein: 6g
- Sugar: 22g
Key health perks: Cocoa provides antioxidants and a subtle boost in mood (that chocolate feeling!), while cinnamon is known for its anti-inflammatory properties. Using real butter and milk adds calcium and flavor, and you can swap in lower-fat or plant-based options if you like.
Potential allergens: Dairy, gluten, egg. See above for substitutions. From a wellness perspective, I treat these as a special treat—not an everyday breakfast, but definitely worth it when you crave comfort. Honestly, nothing beats homemade red velvet cinnamon rolls for a fall brunch that feels indulgent but is made with love.
Conclusion
Red velvet cinnamon rolls bring together everything I love about fall baking—warmth, color, and irresistible comfort. They’re simple enough for any home baker, but special enough to build brunch traditions around. Whether you’re celebrating something big or just want to make a chilly morning a little brighter, this recipe delivers.
So go ahead—customize the filling, tweak the glaze, try a seasonal twist. The best recipes are the ones you make your own! I keep coming back to these rolls whenever I want to wow guests or treat my family, and they never disappoint.
If you give these red velvet cinnamon rolls a try, drop a comment below, share your photos, or tell me what twists you added. Let’s face it—fall brunch just got a whole lot more delicious. Happy baking!
FAQs
Can I make red velvet cinnamon rolls ahead of time?
Absolutely! Shape the rolls, cover, and refrigerate overnight. In the morning, let them come to room temp while the oven preheats, then bake and glaze as usual. Super convenient for brunch.
What if I don’t have red food coloring?
No worries—just skip it! The rolls will be cocoa-cinnamon in color, but still taste amazing. Some folks use beet powder for natural coloring, but it’s optional.
Can I freeze these cinnamon rolls?
Yes, freeze unglazed rolls after baking for up to 2 months. Thaw overnight in the fridge and warm in the oven or microwave, then glaze before serving.
How can I make these gluten-free?
Swap in a gluten-free all-purpose flour blend that contains xanthan gum. The texture changes a bit, but the rolls still come out tasty and fluffy.
What’s the best way to reheat leftover rolls?
Microwave individual rolls for 10-15 seconds or warm in a 300°F (150°C) oven for 7-10 minutes. The glaze will soften, and the rolls get nice and gooey again!
Pin This Recipe!
Red Velvet Cinnamon Rolls
- Total Time: 1 hour 30 minutes
- Yield: 9 rolls 1x
Description
These red velvet cinnamon rolls are soft, fluffy, and packed with cocoa and cinnamon flavor, finished with a creamy glaze. Perfect for fall brunches or cozy mornings, they come together easily and deliver bakery-worthy results at home.
Ingredients
- 2 1/4 cups all-purpose flour (plus extra for dusting)
- 1 packet (2 1/4 tsp) instant yeast
- 1/2 cup warm milk (whole or 2%, about 110°F)
- 1/4 cup granulated sugar
- 1/4 cup unsalted butter, melted
- 1 large egg, room temperature
- 2 tbsp unsweetened cocoa powder
- 1/2 tsp salt
- 1 tsp vanilla extract
- 2–3 tsp red food coloring (gel preferred)
- 1/3 cup unsalted butter, softened
- 2/3 cup brown sugar, packed
- 1 1/2 tbsp ground cinnamon
- 1 tbsp unsweetened cocoa powder (optional)
- 3 oz cream cheese, softened
- 1/4 cup unsalted butter, softened
- 1 cup powdered sugar, sifted
- 1/2 tsp vanilla extract
- 1–2 tbsp milk
- Pinch of salt
Instructions
- In a large mixing bowl, whisk together warm milk, yeast, and 1 tablespoon of sugar. Let sit for 5 minutes until bubbly.
- Add melted butter, remaining sugar, egg, cocoa powder, salt, vanilla, and red food coloring to the yeast mixture. Whisk until well combined.
- Gradually stir in flour, 1 cup at a time. Knead on a floured surface for 5-7 minutes (or use a stand mixer with dough hook for 4-5 minutes) until smooth, elastic, and slightly tacky.
- Place dough in a lightly greased bowl, cover, and let rise in a warm spot for 45-60 minutes, until doubled in size.
- While dough rises, mix softened butter, brown sugar, cinnamon, and cocoa powder in a bowl until combined and spreadable.
- Punch down risen dough and turn onto a floured surface. Roll out into a 12×8-inch rectangle, about 1/4-inch thick.
- Spread cinnamon filling evenly over dough, leaving a 1/2-inch border on one long edge.
- Starting on the opposite long edge, tightly roll up dough into a log. Pinch seam to seal.
- Slice log into 9 even pieces (about 1.25 inches thick) using a sharp knife or bench scraper. Place rolls cut-side up in a greased 8×8-inch pan, spaced slightly apart.
- Cover pan and let rolls rise for 30 minutes. Preheat oven to 350°F during this time.
- Bake rolls for 22-26 minutes, until puffed and lightly golden. Rotate pan halfway through if needed.
- While rolls bake, beat together cream cheese, butter, powdered sugar, vanilla, milk, and pinch of salt until smooth and pourable. Adjust milk for desired consistency.
- Let rolls cool for 10-15 minutes, then drizzle glaze over warm rolls.
Notes
For best results, use quality cocoa powder and gel food coloring. If making ahead, refrigerate shaped rolls overnight and bake fresh in the morning. For gluten-free or vegan adaptations, see substitution tips. Always grease your pan or line with parchment for easy removal. Rolls are best enjoyed warm and can be reheated in the microwave or oven.
- Prep Time: 30 minutes
- Cook Time: 25 minutes
- Category: Breakfast
- Cuisine: American
Nutrition
- Serving Size: 1 roll
- Calories: 320
- Sugar: 22
- Sodium: 250
- Fat: 13
- Saturated Fat: 7
- Carbohydrates: 45
- Fiber: 2
- Protein: 6
Keywords: red velvet, cinnamon rolls, fall brunch, easy breakfast, cream cheese glaze, autumn baking, yeast dough, comfort food