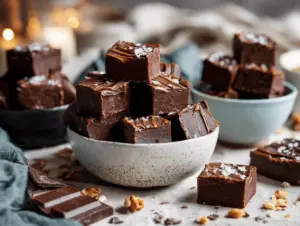
There’s something magical about the glossy sheen and deep, cocoa aroma of homemade chocolate fudge. Picture this: you break off a square, and it’s so velvety and rich that it almost melts between your fingers before you even get it to your mouth. Honestly, chocolate fudge has always been my comfort food, and this particular chocolate fudge recipe is the one I reach for when I want guaranteed results. I still remember the first time I made fudge in my tiny college apartment—it was raining outside, and I was craving something sweet but didn’t want to fuss with baking. That’s when I discovered this foolproof method, and let’s just say, it’s become a staple for birthdays, rainy afternoons, and spontaneous kitchen experiments ever since.
What I love about this chocolate fudge recipe is how easy it is. No thermometers, no worrying about grainy textures—just smooth, luscious chocolate fudge every single time. As a recipe developer (and lifelong chocolate lover), I’ve tested this one more times than I can count. I’ve shared it with my family, tweaked it for friends with dietary needs, and even packed it up as edible gifts for the holidays. Whether you’re a fudge newbie or a seasoned home baker, you’ll appreciate the simplicity and reliability of this method. Plus, it’s the kind of treat that brings people together—kids get wide-eyed with excitement, adults sneak extra pieces, and everyone leaves with a smile.
This chocolate fudge recipe is perfect for busy families, dessert lovers, or anyone who wants a rich & creamy treat without spending hours in the kitchen. You only need a handful of pantry staples and a little patience (waiting for it to set is the hardest part!). If you’ve ever worried about fudge turning out crumbly or too sweet, rest easy—this version is balanced, smooth, and just the right amount of decadent. Let’s dive in and make some chocolate magic, shall we?
Why You’ll Love This Chocolate Fudge Recipe
- Quick & Easy: No candy thermometer required! You can whip up this chocolate fudge in about 15 minutes, not counting the setting time.
- Simple Ingredients: Seriously, you probably already have everything you need—chocolate chips, sweetened condensed milk, butter, and vanilla. No weird additives or specialty stuff.
- Perfect for Any Occasion: Whether it’s a winter holiday, summer picnic, birthday party, or just a regular Tuesday, this fudge fits in. I’ve brought it to potlucks, wrapped it up for Valentine’s Day, and even packed it for road trips.
- Crowd-Pleaser: I’ve never met anyone who said no to a piece of this fudge. Kids gobble it up, adults sneak seconds, and it’s always the first thing to vanish from dessert tables.
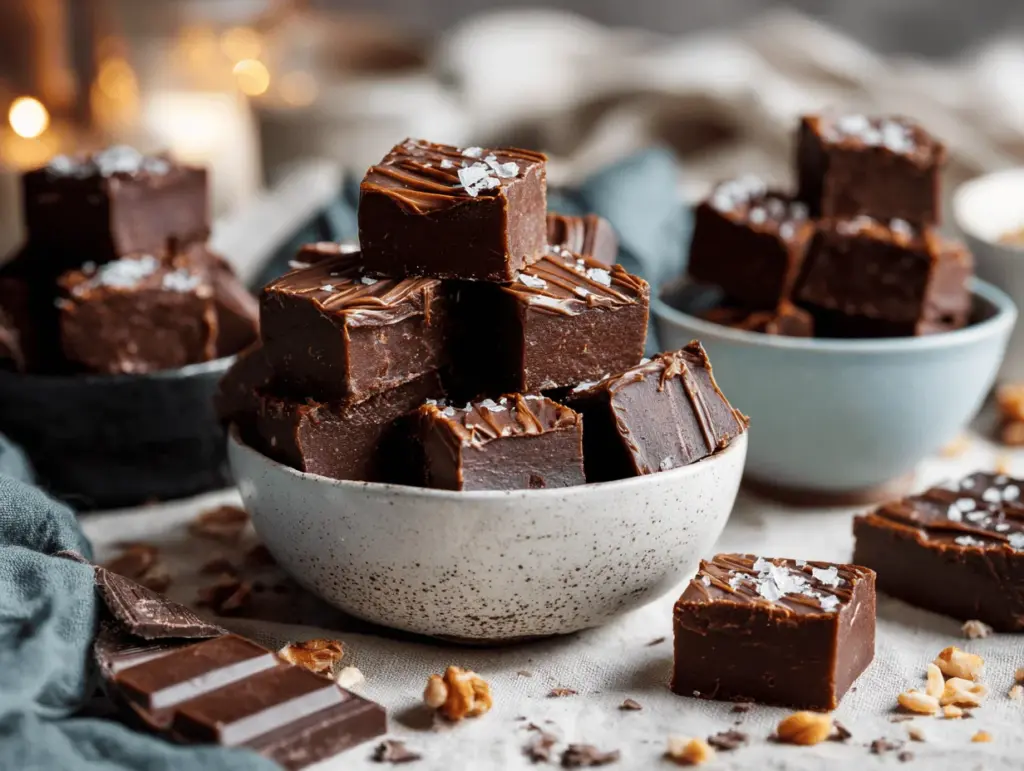
- Unbelievably Delicious: The texture is truly dreamy—soft, dense, and creamy, with a deep chocolate flavor that’s just sweet enough. If you close your eyes after your first bite, I won’t judge.
This isn’t just another chocolate fudge recipe. What sets mine apart is the technique: melting everything together gently and stirring until silky smooth. No gritty sugar crystals, no dry bits—just pure chocolate bliss. I always blend in a little extra butter for richness, and sometimes a pinch of salt to really make the chocolate pop.
Let’s face it, some fudge recipes can be finicky. I’ve had my fair share of failed batches (grainy, crumbly, or weirdly chewy), but this version has never let me down. It’s comfort food, but with a foolproof twist—satisfying, nostalgic, and easy enough for anyone to make. If you’re looking to impress guests (without breaking a sweat) or just want something sweet to enjoy over coffee, this is the chocolate fudge recipe you’ll want to bookmark.
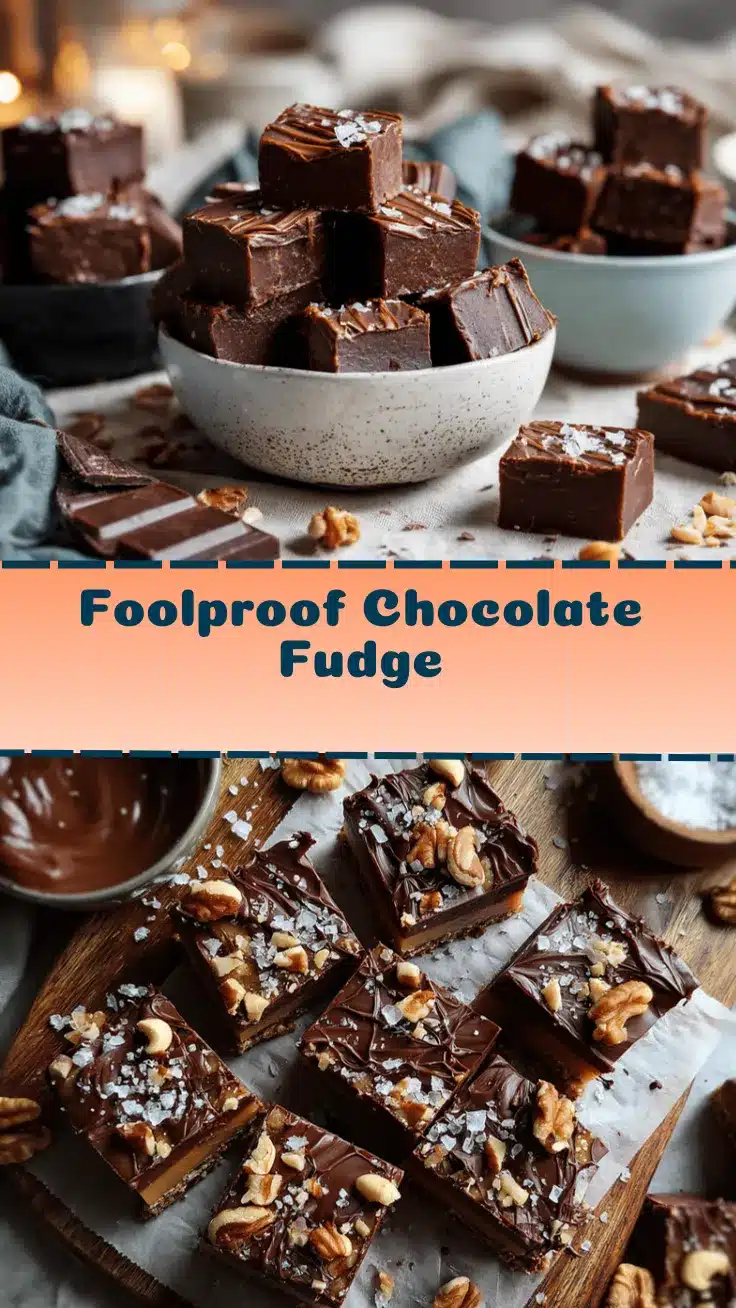
Ingredients Needed for Foolproof Chocolate Fudge
This chocolate fudge recipe keeps things simple—just honest, wholesome ingredients that deliver maximum flavor with minimum fuss. Most of these are pantry staples, and I’ve included notes for substitutions if you want to mix things up. Here’s what you’ll need:
- Chocolate Chips (2 cups / 340g): Semi-sweet is classic, but you can use bittersweet for deeper flavor or milk chocolate for extra sweetness. I personally love Ghirardelli or Guittard—they melt so smoothly!
- Sweetened Condensed Milk (1 can, 14 oz / 397g): This is the key to creamy, rich fudge. Don’t accidentally grab evaporated milk—they’re not the same!
- Unsalted Butter (4 tbsp / 56g), cut into pieces: Adds richness and helps create that melt-in-your-mouth texture. If you only have salted butter, just skip the added salt below.
- Vanilla Extract (1 tsp / 5ml): Rounds out the flavors. Try using real vanilla if you can—it’s worth it.
- Pinch of Salt (about 1/8 tsp): Optional, but it makes the chocolate flavor pop and keeps things from tasting flat.
If you want to jazz things up, here are some optional add-ins (totally up to you):
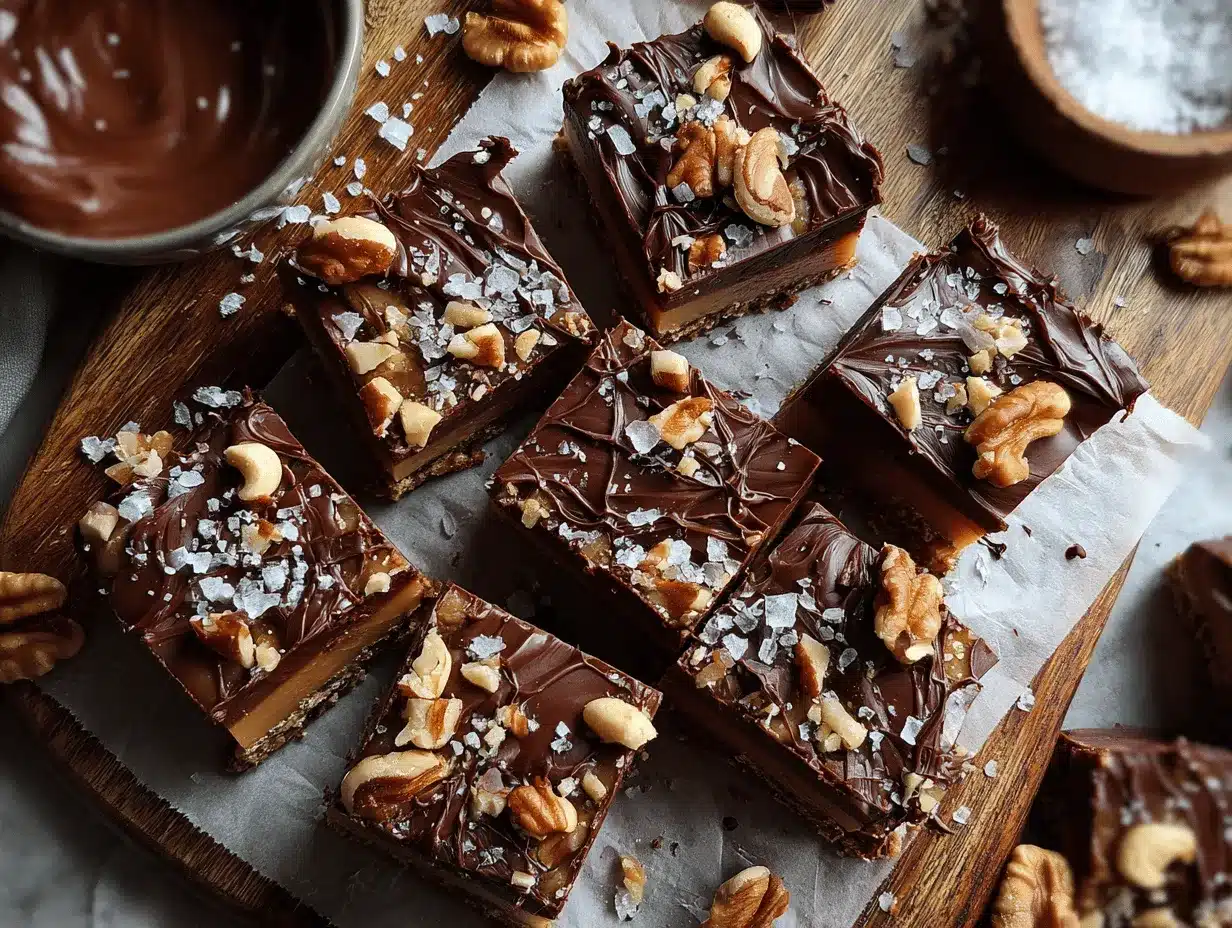
- Chopped Nuts (1/2 cup / 60g): Walnuts, pecans, or almonds are my favorites. Toast them for extra flavor.
- Mini Marshmallows (1/2 cup / 25g): Adds a gooey twist, turning your fudge into “rocky road.”
- Crushed Peppermint (1/4 cup / 30g): Perfect for holidays—just sprinkle on top before chilling.
- Sea Salt Flakes: For a gourmet finish, sprinkle a little on the fudge after pouring into the pan.
Ingredient tips: If you prefer a gluten-free fudge, all the main ingredients are naturally gluten-free—just double-check your chocolate chips. Vegan? Swap the butter for coconut oil and use a plant-based condensed milk (they do exist, and they work pretty well!). In summer, sometimes I toss in dried cherries or orange zest for a bright twist. For nut allergies, skip the nuts or use seeds like pumpkin or sunflower for crunch. Basically, this chocolate fudge recipe is your blank canvas—make it your own!
Equipment Needed for Foolproof Chocolate Fudge
Good news: you don’t need a ton of fancy gadgets to make this chocolate fudge recipe. Here’s what I use every time:
- Medium Saucepan: Heavy-bottomed pans work best for even heat. I’ve used nonstick and stainless steel—both work fine.
- Heatproof Spatula or Wooden Spoon: For stirring the fudge mixture until smooth. Silicone spatulas are easy to clean and scrape down the sides well.
- 8×8-inch (20x20cm) Square Baking Pan: The classic size for thick, even fudge squares. If you only have a 9×9-inch pan, your fudge will be a touch thinner (still delicious).
- Parchment Paper or Nonstick Foil: Makes it easy to lift the set fudge out for cutting. Wax paper can work, but parchment is sturdier.
- Sharp Knife: For slicing neat squares when the fudge is set—bonus points if you warm the blade under hot water first.
Don’t have a square pan? A loaf pan works for thicker pieces, or you can use a glass dish (just line it well). I once made fudge in muffin tins—super cute for bite-size treats! And if your spatula seems sticky after fudge-making, a soak in hot water makes cleanup a breeze. No need for candy thermometers or mixers—just simple tools you probably already have.
Preparation Method: Step-by-Step Chocolate Fudge Recipe
- Prep the Pan: Line your 8×8-inch (20x20cm) baking pan with parchment paper, leaving an overhang for easy removal. Lightly grease the paper if you want extra insurance against sticking. Set aside.
- Melt the Ingredients: Combine 2 cups (340g) chocolate chips, 1 can (14oz/397g) sweetened condensed milk, and 4 tbsp (56g) unsalted butter in a medium saucepan. Heat over low to medium heat, stirring constantly with a spatula. (Don’t crank up the heat—gentle is best for smooth fudge.)
- Stir Until Smooth: Keep stirring as everything starts to melt. The mixture will look thick and glossy. If you see streaks of unmelted chocolate, just keep going—patience pays off! This usually takes about 5-7 minutes.
- Add Vanilla & Salt: Once completely smooth, remove the saucepan from the heat. Stir in 1 tsp (5ml) vanilla extract and a pinch of salt. If you’re adding nuts or extras, fold them in now.
- Pour & Level: Scrape the fudge mixture into your lined pan. Use the spatula to spread it into an even layer. Tap the pan gently on the counter to smooth out any bubbles.
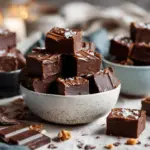
- Optional Toppings: Sprinkle sea salt flakes, extra nuts, or crushed peppermint on top if desired. Press gently so toppings stick.
- Chill to Set: Transfer the pan to the fridge and let the fudge set for at least 2 hours, or until firm. Overnight is even better for extra-firm texture.
- Cut & Serve: Lift the fudge out using the parchment overhang. Use a sharp knife (warmed under hot water, then dried) to slice into squares. Wipe the blade between cuts for clean edges.
If your fudge seems too soft, don’t worry—just let it chill a bit longer. Sometimes, humid weather can slow down setting, so I like to leave it in the fridge overnight. If you notice any greasy separation, it’s usually from overheating the butter—keep the heat low and steady next time. And if you’re in a rush, freezing for 30 minutes can help firm things up (just don’t forget it in there!).
Cooking Tips & Techniques for Perfect Chocolate Fudge
Over the years, I’ve learned a few tricks to guarantee flawless chocolate fudge every time—trust me, I’ve had some kitchen disasters along the way!
- Low & Slow: Melting the chocolate and butter gently is the secret. High heat can scorch the chocolate or split the mixture (been there, done that).
- Constant Stirring: Don’t walk away! Stirring keeps the chocolate silky and prevents burning on the bottom. I use a spatula for easy scraping.
- Quality Chocolate: The better your chocolate chips, the smoother your fudge. I once used a bargain brand and got weird lumps—never again.
- Even Topping Distribution: If you’re adding nuts, mix them in while the fudge is warm. Sprinkling on top works, but folding them in gives every bite crunch.
- Clean Cutting: Warm your knife under hot water, dry it, and slice the fudge. Wipe between cuts for those Instagram-worthy squares.
Common mistakes? Overheating and under-mixing. Once, I tried to rush the melting step—my fudge turned out grainy and greasy (not cute). And if you don’t stir all the way to the bottom, some bits won’t melt, leaving you with chunky fudge. Multitasking helps: I chop nuts or prep toppings while the mixture melts. For extra consistency, measure ingredients with a kitchen scale. Oh, and don’t skip the parchment paper—clean-up is so much easier!
Variations & Adaptations for Foolproof Chocolate Fudge
Ready to make this chocolate fudge recipe your own? Here are some fun ways to switch things up, whether you’ve got dietary needs, flavor cravings, or just want to try something new:
- Gluten-Free: All the main ingredients here are gluten-free, but always double-check your chocolate chips and any toppings. I’ve made this for gluten-sensitive friends with zero issues.
- Vegan: Swap out butter for coconut oil (same amount) and use a plant-based sweetened condensed milk. The texture is just as creamy, with a hint of coconut flavor.
- Nutty Crunch: Fold in toasted walnuts, pecans, or even hazelnuts. For peanut butter fans, swirl a few spoonfuls into the mixture before chilling.
- Flavor Twists: Add orange zest, instant espresso powder, or a dash of cinnamon for a gourmet vibe. I once stirred in a hint of chili powder—surprisingly good!
- Seasonal Adaptations: For holidays, add crushed peppermint or dried cranberries. Around Halloween, I mix in mini marshmallows and candy corn (kids love it).
- Different Cooking Methods: Microwave method works too—heat everything in a microwave-safe bowl in 30-second bursts, stirring each time until smooth.
- Allergen Swaps: If you can’t do nuts, use sunflower or pumpkin seeds for crunch. Dairy-free chocolate chips work great if you need to avoid milk.
My personal favorite? Adding a swirl of salted caramel before pouring into the pan—each bite is a sweet-salty explosion. The beauty of this chocolate fudge recipe is its flexibility; you can make it your own every time.
Serving & Storage Suggestions for Chocolate Fudge
This chocolate fudge recipe is best served slightly chilled, straight from the fridge. The squares hold their shape and have that perfect dense bite. If you want to get fancy, stack pieces on a pretty plate or wrap them in parchment for gift-giving. Pair with fresh berries, a scoop of vanilla ice cream, or a mug of hot coffee for an extra treat.
For storage, keep fudge in an airtight container in the fridge—it stays fresh for up to 2 weeks (if it lasts that long!). You can also freeze fudge for up to 3 months; just wrap pieces tightly in plastic and pop them in a freezer bag. Thaw in the fridge overnight before serving. When reheating, avoid the microwave—let it come to room temp naturally for best texture. I’ve noticed the flavors deepen after a few days, so sometimes I make a batch ahead for special occasions.
If you’re packing fudge for a picnic or lunchbox, layer wax paper between pieces to prevent sticking. And let’s be honest, sneaking a piece straight from the fridge is sometimes the best way to enjoy it!
Nutritional Information & Benefits
Each piece of this chocolate fudge recipe (based on a batch cut into 25 squares) has about 120 calories, 5g fat, 18g carbs, and 1g protein. It’s a treat, so moderation is key.
The main ingredients—chocolate and condensed milk—provide calcium, antioxidants, and a touch of protein. If you add nuts, you get healthy fats and fiber. This fudge is naturally gluten-free, and can be adapted for vegan diets. Watch out for dairy and nut allergens if needed.
In my experience, a little chocolate goes a long way in lifting your mood. This fudge satisfies sweet cravings without the heaviness of a big cake or cookie. Just remember, treats are meant for sharing and savoring!
Conclusion
If you’re looking for a chocolate fudge recipe that’s easy, rich, and always turns out just right, this is the one to try. It’s quick, requires simple ingredients, and is flexible enough for any occasion or dietary need. I love how it brings people together—there’s something about homemade fudge that makes everyone smile.
Whether you stick to the classic version or experiment with fun add-ins, you’ll end up with a creamy, decadent treat you’ll make again and again. Don’t be afraid to customize—chocolate fudge is all about making it your own. If you try this recipe, let me know in the comments! I’d love to hear your variations, tips, and fudge stories. Share this with your fellow chocolate lovers and pin it for your next craving.
Happy fudge-making, friends! May your kitchen always smell like chocolate and your squares always be creamy.
FAQs About Chocolate Fudge Recipe
Can I make this chocolate fudge recipe without condensed milk?
Condensed milk is key for this creamy texture, but you can try using coconut condensed milk or a homemade substitute with full-fat coconut milk and sugar if needed.
How do I keep my fudge from getting grainy?
Low heat and constant stirring are your best friends! Don’t let the mixture boil—gentle melting ensures smooth, silky fudge every time.
Can I use dark chocolate for this recipe?
Absolutely! Swap semi-sweet for dark chocolate chips for a deeper, less sweet fudge. You might want to add an extra tablespoon of butter to keep it creamy.
How long does homemade fudge last?
Stored in an airtight container in the fridge, your chocolate fudge will stay fresh for up to 2 weeks. You can also freeze it for longer storage.
Is this chocolate fudge recipe gluten-free?
Yes, all the main ingredients are naturally gluten-free. Just check your chocolate chips and any add-ins to be sure!
Pin This Recipe!
Chocolate Fudge Recipe – Easy Homemade Rich & Creamy Treat
- Total Time: 2 hours 17 minutes
- Yield: 25 squares 1x
Description
This chocolate fudge recipe is quick, easy, and delivers rich, creamy squares every time—no candy thermometer required. Perfect for holidays, birthdays, or any time you crave a decadent chocolate treat.
Ingredients
- 2 cups semi-sweet chocolate chips (340g)
- 1 can (14 oz) sweetened condensed milk
- 4 tablespoons unsalted butter, cut into pieces
- 1 teaspoon vanilla extract
- Pinch of salt (about 1/8 teaspoon, optional)
- Optional add-ins: 1/2 cup chopped nuts (walnuts, pecans, or almonds), 1/2 cup mini marshmallows, 1/4 cup crushed peppermint, sea salt flakes for topping
Instructions
- Line an 8×8-inch baking pan with parchment paper, leaving an overhang for easy removal. Lightly grease the paper if desired.
- Combine chocolate chips, sweetened condensed milk, and butter in a medium saucepan. Heat over low to medium heat, stirring constantly.
- Continue stirring until the mixture is thick, glossy, and completely smooth (about 5-7 minutes).
- Remove from heat and stir in vanilla extract and a pinch of salt. Fold in any optional add-ins if using.
- Scrape the fudge mixture into the prepared pan and spread evenly. Tap the pan gently to smooth out bubbles.
- Sprinkle optional toppings (sea salt flakes, nuts, peppermint) on top and press gently.
- Chill in the refrigerator for at least 2 hours, or until firm. Overnight is best for extra-firm texture.
- Lift the fudge out using the parchment overhang and slice into squares with a sharp knife (warmed under hot water and dried for clean cuts).
Notes
For vegan fudge, substitute butter with coconut oil and use plant-based condensed milk. Use high-quality chocolate chips for best texture. If fudge is too soft, chill longer or freeze for 30 minutes. Warm knife under hot water for clean cuts. Store in an airtight container in the fridge for up to 2 weeks or freeze for up to 3 months.
- Prep Time: 10 minutes
- Cook Time: 7 minutes
- Category: Dessert
- Cuisine: American
Nutrition
- Serving Size: 1 square (1/25th of batch)
- Calories: 120
- Sugar: 16
- Sodium: 30
- Fat: 5
- Saturated Fat: 3
- Carbohydrates: 18
- Fiber: 1
- Protein: 1
Keywords: chocolate fudge, easy fudge, homemade fudge, creamy fudge, gluten-free fudge, holiday dessert, edible gifts, quick dessert, no bake fudge, rich chocolate treat