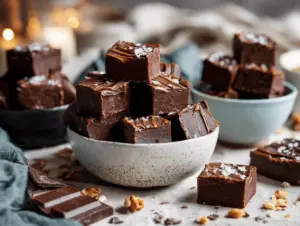
The first time I made cookies and cream fudge, I was standing in my kitchen with a half-empty package of Oreos and a craving for something sweet—but not the usual cookies or brownies. The aroma that filled the house was unreal: a mix of creamy white chocolate and that unmistakable, nostalgic scent of crushed chocolate cookies. Honestly, it was the kind of treat that makes you sneak a taste before it’s even set. If you’re anything like me, there’s something wildly comforting about fudge—especially when it’s loaded with cookies and cream goodness.
Cookies and cream fudge is one of those recipes you make once and then you’re hooked for life. It’s ridiculously simple, no candy thermometer required, and you get that decadent, velvety texture with crunchy cookie pieces in every bite. I started making this version during fall potluck season when I wanted something that looked impressive, traveled well, and—let’s face it—vanished before the dinner plates were even out. Whether you’re a fudge fanatic or just love easy desserts, this recipe is a total game-changer. It’s perfect for busy families, folks with a sweet tooth, and anyone who wants a quick win in the kitchen.
I’ve tested this cookies and cream fudge recipe more times than I can count, tweaking the ingredient ratios and trying different brands of chocolate (I’m picky about my fudge, you know?). This recipe nails that perfect balance: not too sweet, with just the right amount of crunch and creaminess. If you’re after a crowd-pleaser that brings a little nostalgia and a whole lot of flavor, you’re in the right place. Let’s get ready to make the ultimate cookies and cream fudge—your new favorite fall potluck treat!
Why You’ll Love This Recipe
After years of experimenting with fudge recipes, this cookies and cream fudge has earned its spot as my go-to for any gathering—especially fall potlucks. It’s been kid-tested, friend-approved, and the feedback is always the same: “Can I have the recipe?” Here’s why you’ll want to bookmark this one:
- Quick & Easy: You can whip this up in about 15 minutes, and it sets in under 2 hours. Perfect for those “Oh no, I need to bring something!” moments.
- Simple Ingredients: There’s nothing fancy—most are pantry staples, and you can grab everything at a regular grocery store.
- Perfect for Fall Potlucks: It travels well, doesn’t melt too quickly, and looks gorgeous on a dessert table.
- Crowd-Pleaser: Adults and kids both rave about it. It’s got that classic cookies and cream flavor with a velvety fudge texture.
- Unbelievably Delicious: The combo of smooth white chocolate and crunchy cookie bits is just next-level comfort food.
What sets this cookies and cream fudge apart is how the cookies are folded in gently, so you get big, beautiful swirls and chunks in every square. I use a little extra vanilla to round out the flavors (learned that trick after a few batches came out too sweet). This isn’t just another fudge—it’s the one you’ll want to share, keep, and make again.
Honestly, every time I make it, I’m reminded why I love baking for potlucks: it’s about bringing people together with something that makes everyone smile. This fudge delivers that cozy, “just one more piece” feeling. Whether you’re impressing guests or just treating yourself, it’s the sort of dessert that turns a regular day into something special. Trust me—you’ll love it!
Ingredients Needed
This cookies and cream fudge recipe keeps things simple but seriously delicious. You’ll find all the ingredients at your local store (or probably in your pantry right now). Here’s what you’ll need:
- White chocolate chips (3 cups / 510g) – Preferably a quality brand like Ghirardelli or Nestlé; melts smoothly for perfect texture.
- Sweetened condensed milk (1 can / 14 oz / 396g) – This is the secret to ultra-creamy, rich fudge.
- Butter (2 tablespoons / 28g, unsalted) – Adds richness; I find unsalted gives you more control over flavor.
- Vanilla extract (1 teaspoon / 5ml) – Enhances the cookies and cream flavor; use pure vanilla for best results.
- Chocolate sandwich cookies (20 cookies, roughly chopped) – Classic Oreos work great, but any brand will do (you can use double-stuf for extra creaminess!).
- Salt (pinch) – Optional, but it helps balance the sweetness.
Optional mix-ins and toppings:
- Mini chocolate chips (¼ cup / 40g) – For even more chocolate crunch.
- Extra crushed cookies (2-3 cookies, for topping) – It looks pretty and gives a little extra texture on top.
Substitution tips:
- Dairy-free: Use vegan white chocolate chips and coconut condensed milk. Swap butter for plant-based margarine.
- Gluten-free: Opt for gluten-free chocolate sandwich cookies (brands like Glutino work well).
- Less sugar: Try using sugar-free cookies and chips, but keep in mind the texture may change slightly.
I usually go for regular Oreos, but the fudge works with golden or flavored varieties too. During the holidays, I’ll sometimes use peppermint sandwich cookies for a fun twist. If you’re shopping, make sure the white chocolate chips are creamy and not chalky—some store brands can be hit or miss! Honestly, this ingredient list is a lifesaver when I need something quick, impressive, and hassle-free.
Equipment Needed
Making cookies and cream fudge doesn’t require any fancy equipment (thank goodness!). Here’s what you’ll need:
- Medium saucepan – For melting the chocolate and butter. A heavy-bottomed pan helps prevent burning.
- Wooden spoon or silicone spatula – To stir the mixture and fold in the cookies.
- 8×8-inch (20x20cm) square baking pan – Gives you thick, even squares. You can use a 9×9-inch for thinner pieces.
- Parchment paper or nonstick foil – Makes removing and slicing the fudge a breeze.
- Sharp knife – For chopping cookies and slicing finished fudge. Serrated knives work best, especially if you like big cookie chunks.
- Microwave-safe bowl (optional) – If you want to melt the chocolate in the microwave instead of on the stove.
If you don’t have a square pan, you can use a loaf pan for thicker pieces, or even a pie dish in a pinch (been there, done that). As for spatulas, silicone is easier to clean and doesn’t hold onto fudge residue. If your pan is prone to sticking, just double up on parchment paper. I’ve used budget pans and fancy ones—the fudge turns out great either way, as long as you line it well. A sturdy wooden spoon is my go-to, but even a regular spoon works if you’re careful not to scratch your pan. Keep it simple!
Preparation Method
- Prepare your pan: Line an 8×8-inch (20x20cm) square baking pan with parchment paper, leaving an overhang for easy removal. Lightly grease the paper if you want extra insurance against sticking.
- Chop the cookies: Roughly chop 20 chocolate sandwich cookies into bite-sized pieces. Set aside 2-3 cookies for topping if you like a pretty finish.
- Melt the chocolate: In a medium saucepan over low heat, combine 3 cups (510g) white chocolate chips, 2 tablespoons (28g) unsalted butter, and 1 can (14oz/396g) sweetened condensed milk. Stir constantly for 4-6 minutes until smooth and glossy. Watch closely—white chocolate can scorch if you walk away!
- Add vanilla and salt: Remove from heat. Stir in 1 teaspoon (5ml) vanilla extract and a pinch of salt. The mixture should smell sweet and creamy, with no lumps.
- Fold in cookies: Gently fold in the chopped cookies using a spatula. Don’t overmix—you want visible cookie chunks and swirls! If you’re adding mini chocolate chips, toss them in now.
- Transfer and level: Pour the fudge mixture into your prepared pan. Use the spatula to smooth the top. Sprinkle reserved crushed cookies evenly on top and press them in lightly.
- Set and chill: Refrigerate for 1-2 hours until firm. For quicker setting, pop the pan in the freezer for 45 minutes (just don’t forget it!).
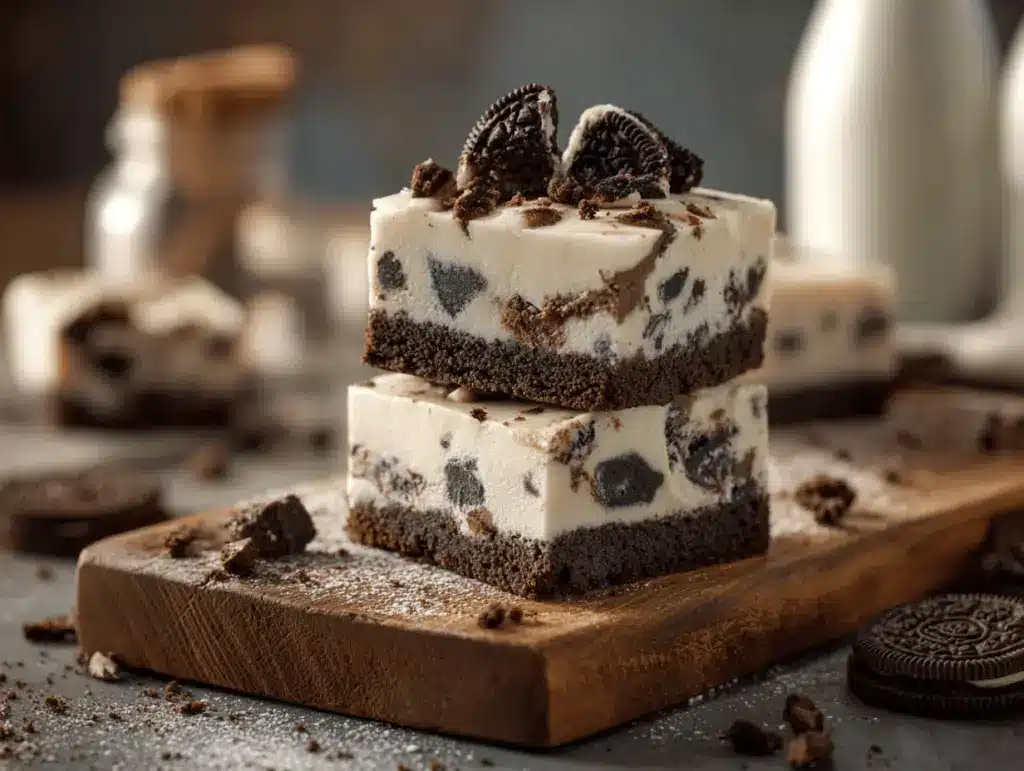
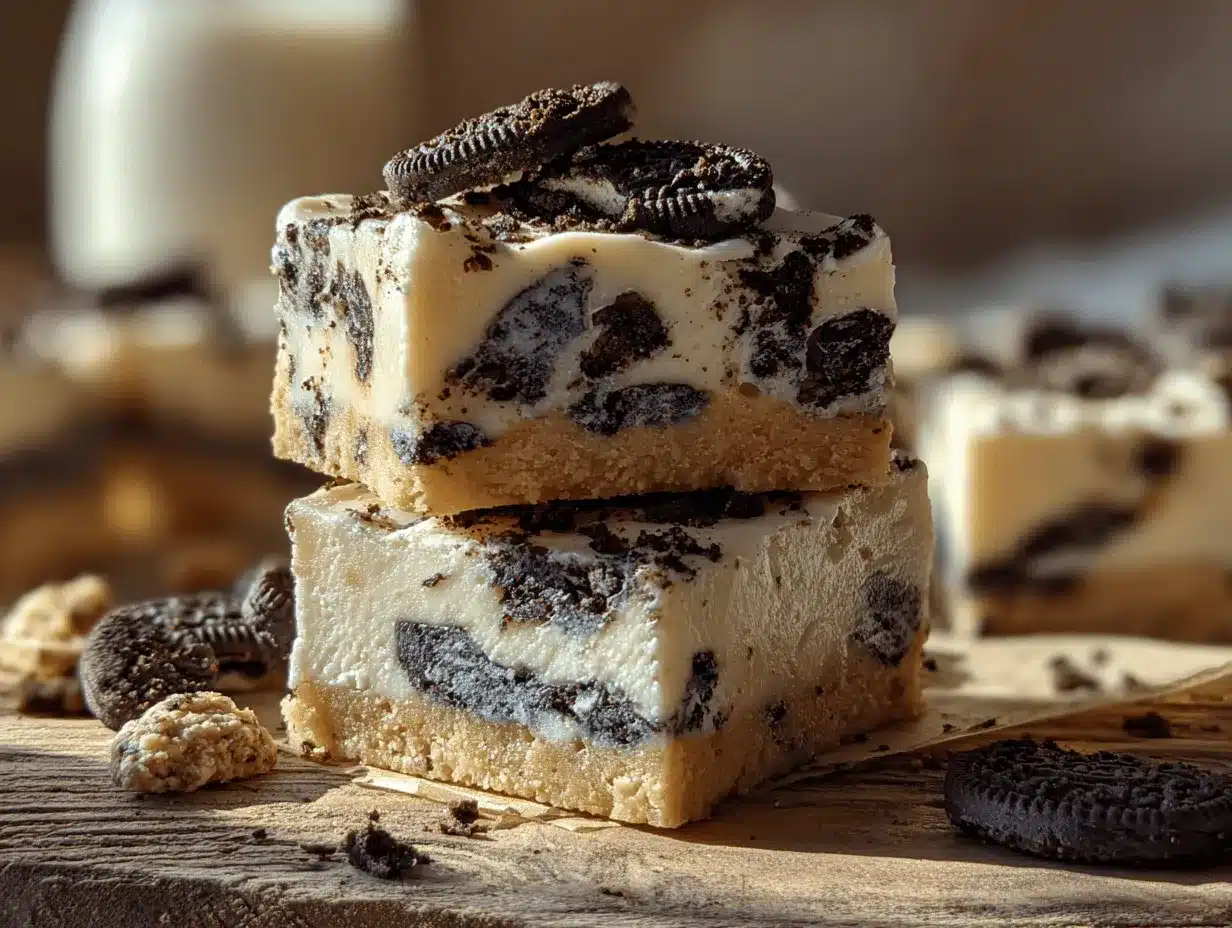
- Slice and serve: Lift the fudge out using the parchment overhang. Cut into 16 squares using a sharp, slightly warmed knife (run under hot water and wipe dry for cleaner cuts). The fudge should be firm but creamy, with visible cookie pieces.
Preparation notes: If your fudge feels too soft, chill it longer. If you notice oily separation during melting, reduce the heat and keep stirring. The mixture should never boil—slow and steady wins here. For extra-thick fudge, use a loaf pan instead (it will need 30 minutes longer to set).
Troubleshooting: If the fudge is crumbly, it may have cooked too fast—try melting slower next time. If the cookies dissolve too much, fold them in gently and don’t let the mixture sit hot for too long. I’ve rushed this step before, and trust me, keeping your cool makes all the difference!
Cooking Tips & Techniques
Let’s face it: fudge can be a little tricky if you’re not careful, but with cookies and cream fudge, you get some wiggle room. Here are my best tips from years of fudge-making (and a few mistakes along the way):
- Low and slow wins the race: White chocolate burns fast. Keep the heat low and stir constantly.
- Don’t overmix: Once you fold in the cookies, stop stirring. Overmixing breaks them down and muddies the fudge’s look.
- Chill time matters: I’ve tried rushing by freezing, but fridge-setting gives smoother texture. If you’re short on time, 45 minutes in the freezer is okay, but don’t leave it in overnight (it gets too hard).
- Clean cuts for pretty squares: Warm your knife before slicing, then wipe between each cut. You get those perfect Pinterest-worthy pieces.
- Troubleshooting oily fudge: If you see separation, you probably melted too quickly. Next time, add a splash more condensed milk and stir gently.
I’ve had batches turn out a bit grainy when I used bargain white chocolate chips or melted at high heat. Stick to a trusted brand and don’t rush. If you want to multitask, chop cookies while the chocolate melts, but keep an eye on the pan—white chocolate is sneaky. For consistent results, measure ingredients precisely and use fresh cookies (stale ones get soggy and blend in too much).
In my kitchen, I’ve learned the beauty of fudge is in its forgiving nature. If you mess up, most mistakes can be patched with extra chilling or a sprinkle of cookie crumbs on top (makes it look intentional!). The most important thing? Have fun and don’t stress if it’s not perfect. Fudge is meant to be enjoyed!
Variations & Adaptations
Cookies and cream fudge is endlessly customizable. I love playing with flavors and textures, especially when making it for different folks or occasions. Here are a few ways to shake things up:
- Seasonal twist: Swap in pumpkin spice sandwich cookies during fall, or peppermint ones for the holidays. Adds a festive flavor and pretty color!
- Dietary swaps: Use gluten-free chocolate sandwich cookies and dairy-free white chocolate chips for an allergy-friendly version. Coconut condensed milk works in place of regular, too.
- Flavor explosion: Add a teaspoon of espresso powder for mocha fudge, or swirl in peanut butter for a nutty take on cookies and cream.
Cooking method adaptation: If you don’t want to use a stovetop, melt white chocolate chips and butter in the microwave in 30-second bursts, stirring well between each. Just be gentle—overheating makes chocolate chalky fast.
Personal favorite: One fall, I mixed in caramel bits and used golden sandwich cookies. The result was a butterscotch-cookies and cream fudge that disappeared in minutes at a family get-together!
Don’t be afraid to adjust the cookie-to-fudge ratio, toss in a handful of chopped nuts, or sprinkle colored sugars for extra pizzazz. This recipe is forgiving, so make it your own. The best batches happen when you’re feeling a little creative!
Serving & Storage Suggestions
Cookies and cream fudge shines when served at room temperature. I like to slice the fudge into neat squares and arrange them on a pretty platter with a sprinkle of extra cookie crumbs. For potlucks, stack pieces in cupcake liners—makes grabbing easy and keeps fingers clean.
Pair this fudge with a mug of hot apple cider, spiced tea, or coffee for a cozy fall treat. If you’re setting up a dessert table, it looks great alongside brownies, pumpkin bread, or caramel popcorn.
Storage tips: Store fudge in an airtight container in the fridge for up to 1 week. You can freeze it for up to 2 months—just wrap tightly in plastic and then foil. To serve from frozen, let it thaw in the fridge overnight for best texture.
For reheating, let the fudge sit out at room temp for 20-30 minutes (never microwave, it melts unevenly!). The flavors actually deepen after a day or two, so if you have the patience, make it ahead. That creamy-crunchy combo just gets better with time!
Nutritional Information & Benefits
Each square of cookies and cream fudge (about 1/16 of the batch) contains roughly:
- Calories: 170
- Fat: 7g
- Carbohydrates: 24g
- Protein: 2g
- Sugar: 18g
This fudge is naturally gluten-free if you use gluten-free cookies, and you can make it dairy-free with simple swaps. White chocolate chips offer calcium, and condensed milk adds a bit of protein. The cookies bring a little fiber and that classic flavor everyone loves.
It’s definitely a treat, but I love that you can adjust for allergies or dietary needs. In our house, fudge is a “sometimes food”—a special comfort that brings people together. If you’re mindful of sugar, enjoy in moderation or try sugar-free swaps. Always check for allergens in your cookie or chocolate brands if sharing with a crowd!
Conclusion
If you’re searching for a dessert that’s as easy as it is irresistible, cookies and cream fudge is your answer. It’s rich, creamy, perfectly sweet, and packed with the nostalgic crunch of chocolate sandwich cookies. Whether you’re prepping for a fall potluck, holiday party, or just a cozy night in, this fudge is a guaranteed hit—and honestly, it’s the kind of recipe you’ll end up sharing (and remaking) again and again.
Feel free to tweak the flavors, swap cookies, or add your own twist. The beauty of this recipe is in its flexibility and fun. I love it because it reminds me of childhood treats with a grown-up touch—and it never fails to make people smile.
So, go ahead—give it a try, leave a comment with your favorite variation, or share your batch on social media. I’d love to hear how your cookies and cream fudge turns out! Happy baking, and enjoy every sweet, creamy bite!
FAQs
Can I make cookies and cream fudge ahead of time?
Absolutely! It actually tastes even better after a day or two. Just store it tightly wrapped in the fridge until you’re ready to serve.
What’s the best way to cut cookies and cream fudge neatly?
Use a sharp, slightly warmed knife and wipe it clean between cuts. This helps keep the fudge squares looking perfect and the cookie chunks intact.
Can I freeze cookies and cream fudge?
Yes, you can freeze it for up to 2 months. Wrap pieces tightly in plastic and foil. Let them thaw in the fridge overnight before serving.
Can I use other types of cookies?
Definitely! Try golden sandwich cookies, mint-flavored ones, or even chocolate chip cookies for new flavors. Just keep the ratios similar.
Is cookies and cream fudge gluten-free?
It can be if you use gluten-free sandwich cookies. Always check your other ingredients to be sure, especially if serving people with allergies.
Pin This Recipe!


Cookies and Cream Fudge
- Total Time: 2 hours
- Yield: 16 squares 1x
Description
This easy cookies and cream fudge combines creamy white chocolate and crunchy chocolate sandwich cookies for a decadent, crowd-pleasing treat. Perfect for fall potlucks, holiday parties, or a cozy night in, it’s quick to make and always a hit.
Ingredients
- 3 cups white chocolate chips (about 18 oz)
- 1 can (14 oz) sweetened condensed milk
- 2 tablespoons unsalted butter
- 1 teaspoon vanilla extract
- 20 chocolate sandwich cookies (such as Oreos), roughly chopped
- Pinch of salt
- 1/4 cup mini chocolate chips (optional)
- 2–3 extra chocolate sandwich cookies, crushed for topping (optional)
Instructions
- Line an 8×8-inch square baking pan with parchment paper, leaving an overhang for easy removal. Lightly grease the paper if desired.
- Roughly chop 20 chocolate sandwich cookies into bite-sized pieces. Set aside 2-3 cookies for topping.
- In a medium saucepan over low heat, combine white chocolate chips, unsalted butter, and sweetened condensed milk. Stir constantly for 4-6 minutes until smooth and glossy.
- Remove from heat. Stir in vanilla extract and a pinch of salt until well combined.
- Gently fold in the chopped cookies (and mini chocolate chips, if using) with a spatula. Do not overmix.
- Pour the fudge mixture into the prepared pan and smooth the top. Sprinkle reserved crushed cookies evenly on top and press lightly.
- Refrigerate for 1-2 hours until firm, or freeze for 45 minutes for quicker setting.
- Lift the fudge out using the parchment overhang. Cut into 16 squares with a sharp, slightly warmed knife. Serve at room temperature.
Notes
For gluten-free fudge, use gluten-free chocolate sandwich cookies. Dairy-free swaps include vegan white chocolate chips and coconut condensed milk. Chill fudge thoroughly for best texture. Warm your knife for clean cuts. Fudge can be made ahead and tastes even better after a day or two. Store in an airtight container in the fridge for up to 1 week or freeze for up to 2 months.
- Prep Time: 15 minutes
- Cook Time: 6 minutes
- Category: Dessert
- Cuisine: American
Nutrition
- Serving Size: 1 square (1/16 of batch)
- Calories: 170
- Sugar: 18
- Sodium: 60
- Fat: 7
- Saturated Fat: 4
- Carbohydrates: 24
- Fiber: 1
- Protein: 2
Keywords: cookies and cream fudge, easy fudge, fall potluck dessert, white chocolate fudge, Oreo fudge, kid-friendly dessert, gluten-free option, holiday treat